Introducing Terraform

Terraform is the most popular tool for managing the lifecycle of infrastructure by defining the desired environment using code. In this article we will take a look at why Terraform was created, how to install Terraform on your system, and walk through an example configuration using Microsoft Azure to illustrate the workflow of using Terraform to manage your infrastructure as code.

What is Terraform?

Terraform is an open source tool created by HashiCorp to provision infrastructure and manage resources throughout their lifecycle. Terraform is driven by three critical design principles:

  1. Manage resources on any cloud or platform
  2. Define infrastructure declaratively using code
  3. Predictably create and manage resources

Why use Terraform?

Before you decide whether Terraform is the right tool to assist you in your infrastructure management efforts, it's useful to zoom out and understand why you might choose to use Infrastructure as Code (IaC) to begin with.

Prior to the advent of cloud computing, data center management was a relatively static and manual process for most organizations. Assets like servers, storage, and networking did not change frequently; allowing you to provision and manage systems with manual processes and procedures.

The introduction of virtualization made data center infrastructure more dynamic, as resources like virtual machines, software defined storage, and virtual networks could now be created and altered on demand using REST-based APIs.

Then cloud platforms like AWS, Azure, and Google Cloud arrived on the scene and suddenly the rate of change and scale of infrastructure grew exponentially. Previous processes of managing the deployment and configuration of resources manually became untenable for an organization.

New tools had to be developed for the dynamic operations required in a cloud computing era, and in that crucible, infrastructure as code tools were created to solve the challenges of infrastructure automation.

What are the benefits of using Infrastructure as Code?

Benefit Explanation
Consistency By using code to manage your resources, you remove the manual element of infrastructure provisioning and configuration. Different environments that use the same infrastructure code will be deployed consistently.
Automation Doing things manually makes it difficult to scale and automate operations. Infrastructure as code is code, so it can use the principles of software development and deployment to automate infrastructure operations.
Predictability Using code allows you to consistently create resources, and with the right workflow it can also make ongoing management predictable as well. Infrastructure as code combined with an understanding of an environment's current state allows an IaC tool to generate proposed changes before altering the managed resources.
Reusability A key principle of software development is modularity and reusability. The concept of "Don't Repeat Yourself" (DRY) programming encourages reuse of existing code, rather than reinventing the wheel each time. Infrastructure as code enables DRY programming for your managed environment.

Key Features of Terraform

Terraform embraces the benefits of using infrastructure as code, while adding some additional features that give it an edge over other solutions.

Feature Explanation
Declarative Configuration Rather than forcing you to write the logic to provision infrastructure, Terraform allows you to declare your intent and let Terraform core and provider plugins deal with the details.
Any Cloud Terraform uses a provider plugin framework enabling it to apply consistent logic and operations across any cloud provider or different types of platforms. Really, anything that has an API.
Open Registry The public registry for Terraform contains hundreds of providers and thousands of modules, all open-source, and freely available for use. You can leverage the investments of others and focus on what makes your architecture unique.
Agentless Terraform does not require agents to be installed on endpoints, with all the headaches that typically entails. It also doesn't require direct access to managed resources, since it uses the front-facing API endpoints of cloud providers and platforms.

Terraform vs. Other Tools

Terraform isn't the only tool out there to provision infrastructure, and it might not even be the best solution for your organization. While it does bring the key benefits of cloud agnosticism, declarative configuration, and agentless operations; there are other popular solutions that can also solve the challenges of managing infrastructure as code.

Some of the most popular tools include:

  • CloudFormation - Amazon Web Services' native tool for IaC
  • Azure Bicep - Microsoft's Azure specific tool for IaC
  • Ansible - A popular automation tool from Red Hat
  • Pulumi - A solution that uses common programming languages to implement IaC

That's by no means an exhaustive list, but if you're curious about how these solutions compare to Terraform, I'd recommend reading this article.

Installation and Setup

For our example, we are going to use Terraform to deploy infrastructure on Microsoft Azure. The core principles in this example are broadly applicable to any cloud provider, like AWS or Google Cloud. First and foremost, we need to install Terraform.

Installing Terraform

The Terraform CLI client is a single executable binary compiled from Go. There's no installation package or wizard to walk through. You simply download the appropriate binary for your operating system and architecture from the Terraform website, or through your package manager of choice.
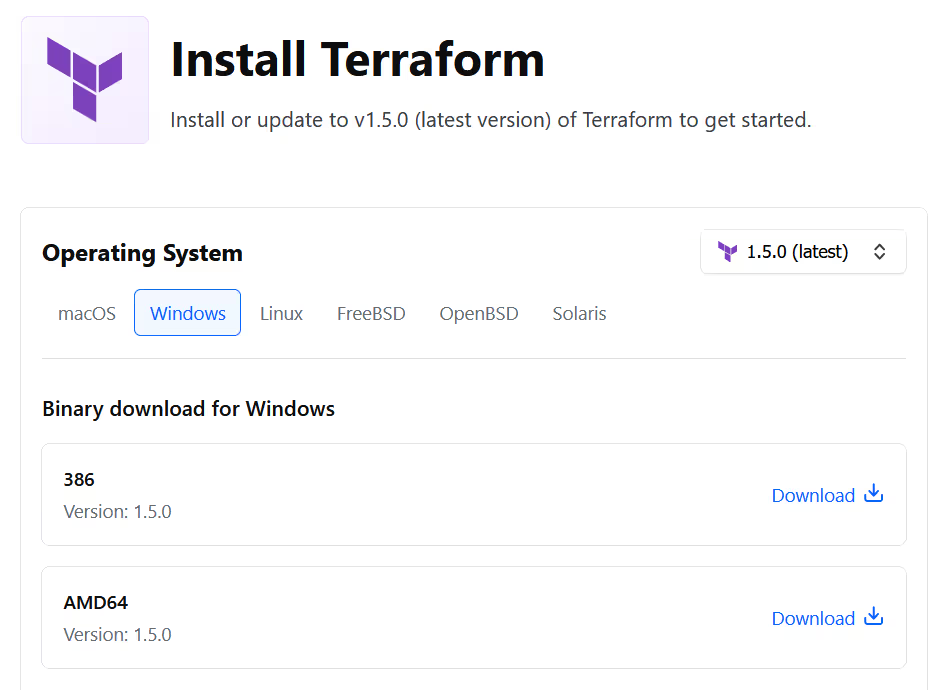
Terraform installation page from terraform.io with the Windows operating system selected.

Since it's open source, you can also go directly to the GitHub repository and download the latest release or build it yourself from source. Once you've downloaded the Terraform binary, simply place it in a location on your system included in the PATH Terraform environment variable.

Microsoft Azure Setup

Since we will be using Microsoft Azure for the example, you will need to have a subscription on Microsoft Azure to follow along and the Azure CLI installed locally. You can alternatively leverage the Azure Cloud Shell, if you prefer not to install anything on your local system.
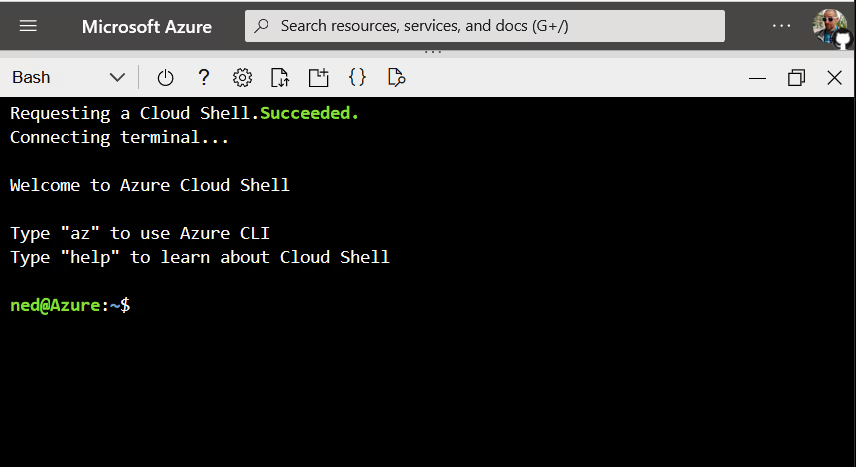
The Azure Cloud Shell environment running in a browser.

The Azure Cloud Shell environment includes both the Azure CLI and the Terraform binary as part of the pre-built Terraform environment, and it even has a built-in code editor. Honestly, a pretty good choice for trying something out.

If you choose to run Terraform on your local system, you will need to log into Microsoft Azure using the CLI to provide authentication credentials and select a subscription for Terraform use.

Run the following commands substituting your subscription name for the [.code]SUB_NAME[.code] placeholder:

# Login into Azure in a browser
az login

# Select the Azure subscription to use
az account set -s SUB_NAME

Terraform will automatically find your stored Azure CLI credentials and selected subscription, and use those for the deployment of infrastructure.

Creating a File Structure

We're also going to need somewhere to store our declarative configuration files. From a terminal prompt, run the following commands to create a directory and files that will hold our Terraform configuration files.

# Create a directory for the configuration
mkdir azure_configuration && cd azure_configuration

# Create two files for our configuration
# Bash or zsh
touch {main,terraform}.tf

# PowerShell
("main","terraform") | % {New-Item -Name "$_.tf"}

# Login into Azure in a [.code]browseraz login#[.code] Select the Azure subscription to [.code]useaz account set -s SUB_NAME[.code].

You will now have a directory called [.code]azure_configuration[.code] with the files [.code]main.tf[.code] and [.code]terraform.tf[.code] inside.

With these prerequisites in place, we are ready to start defining some infrastructure as code!

Writing Terraform Code

Terraform describes infrastructure declaratively using either Javascript Object Notation (JSON) or HashiCorp Configuration Language (HCL). Use of HCL is far more common, so that is what we'll use for our example.

Understanding the HashiCorp Configuration Language

HashiCorp designed HCL to be human-readable, simple to write, and declarative in nature. The core construct of HCL is the configuration block, which defines an object in HCL and the arguments that will configure it. For instance, a resource configuration block takes the form:

# main.tf
resource "azurerm_resource_group" "main" {
  name = "taco-truck"
  location = "eastus"
}

The first term in the block defines what type of object is being declared, in this case we are creating a resource. The next term defines what type of resource we are creating, an Azure resource group. And the third term defines a name label we can use to reference the resource elsewhere in our configuration.

Inside of the block- denoted by the curly braces [.code]{}-[.code] are the arguments that configure properties of the resource. We are setting a name for the resource group and the location in Azure where it should be created. If you're following along, go ahead and add the block above to your main.tf file.

The more general syntax for configuration blocks in HCL looks like this:

BLOCK_TYPE [LABEL_1] [LABEL_2]... {
  # Arguments
  IDENTIFIER = EXPRESSION
}

Any object type you create with Terraform will follow this syntax. Speaking of which, let's add a new resource to our infrastructure as code!

Creating and Referencing Resources

Now that we have an Azure resource group in our example configuration, we should put something in that resource group! Why don't we deploy an Azure Container Instance?

You might wonder what arguments are available for a given resource. The documentation for resources can be found on the Terraform public registry under the provider that manages them.
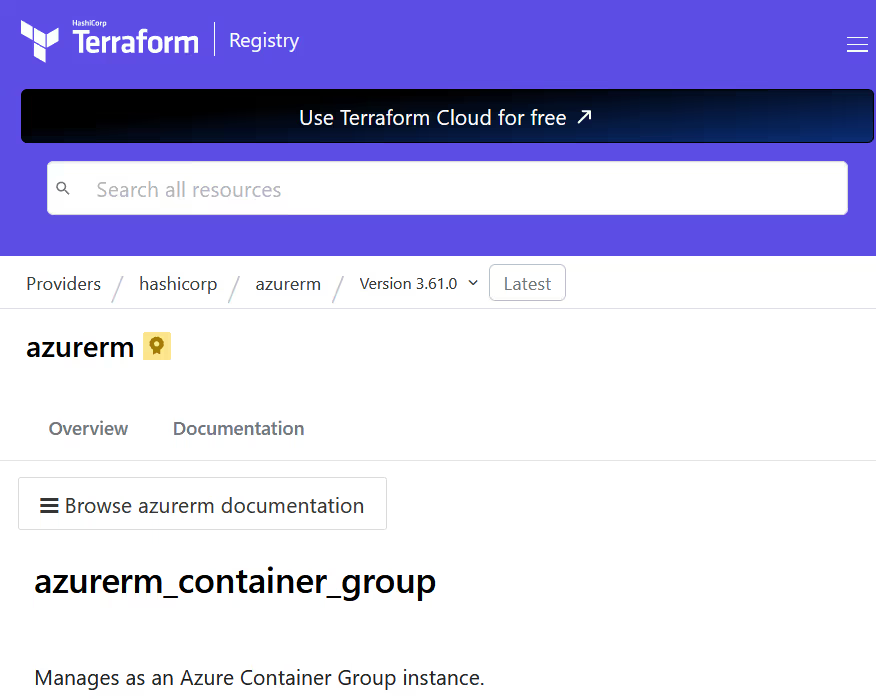
The documentation for the azurerm_container_group on the azurerm provider page of the Terraform public registry.

The resource documentation includes the argument, attributes, and example usage of the resource. For instance, the example provided for the [.code]azurerm_container_group[.code] looks like this:

resource "azurerm_container_group" "example" {
  name                = "example-continst"
  location            = azurerm_resource_group.example.location
  resource_group_name = azurerm_resource_group.example.name
  ip_address_type     = "Public"
  dns_name_label      = "aci-label"
  os_type             = "Linux"

  container {
    name   = "hello-world"
    image  = "mcr.microsoft.com/azuredocs/aci-helloworld:latest"
    cpu    = "0.5"
    memory = "1.5"

    ports {
      port     = 443
      protocol = "TCP"
    }
  }

  container {
    name   = "sidecar"
    image  = "mcr.microsoft.com/azuredocs/aci-tutorial-sidecar"
    cpu    = "0.5"
    memory = "1.5"
  }

  tags = {
    environment = "testing"
  }
}

At the beginning of the block, the location argument is referencing the [.code]azurerm_resource_group[.code] object. Terraform uses special expressions to refer to other objects in the configuration. For resources, the format is:

[resource_type].[name_label].[attribute]

If we want to reference the name attribute of the resource group in our configuration, the syntax would be:

azurerm_resource_group.main.name

In fact, why don't we use a simpler version of the [.code]azurerm_container_group[.code] resource and include references to our resource group for the [.code]location[.code] and [.code]resource_group_name[.code].

resource "azurerm_container_group" "main" {
  name                = "taco-truck-app"
  location            = azurerm_resource_group.main.location
  resource_group_name = azurerm_resource_group.main.name
  ip_address_type     = "Public"
  os_type             = "Linux"

  container {
    name   = "truck-app"
    image  = "mcr.microsoft.com/azuredocs/aci-helloworld:latest"
    cpu    = "0.5"
    memory = "1.5"

    ports {
      port     = 80
      protocol = "TCP"
    }
  }
}

The reference to our resource group within the [.code]azurerm_container_group[.code] block creates an implicit dependency between the resource group and the container instance.

When planning changes, Terraform creates a dependency graph of all objects in the infrastructure code to determine the order of operations. The reference expression tells Terraform that the resource group needs to exist before the container instance can be created.

Define Input Variables in Terraform

While our infrastructure code so far is functional, it isn't very dynamic. All of the values are hard-coded, reducing flexibility and code reuse. Fortunately, we can define input variables in our Terraform code, allowing us to provide values at run time.

An input variable is defined using a configuration block (what else?!) with the keyword [.code]variable[.code] and a name label used to refer to the variable elsewhere in the code. For instance, let's create a variable to make our Azure region configurable:

variable "azure_region" {}

Technically, the variable configuration block doesn't require any arguments inside, but that's not really a best practice. At the very least, we should define what types of input values we're expecting and a description of what the variable is for.

variable "azure_region" {
  type        = string
  description = "Azure region to use for resources."
}

That's definitely better. Another optional argument is setting a default value for the input variable. Terraform requires that all variables have a value at run time. By providing a default values in the configuration block, we won't require the user to provide one.

variable "azure_region" {
  type        = string
  description = "Azure region to use for resources. Defaults to eastus"
  default     = "eastus"
}

Now our [.code]azure_region[.code] variable will use the East US region by default, which just happens to be the value we're currently using for our resource group. Speaking of which, we should update our resource group to use our shiny new input variable.

resource "azurerm_resource_group" "main" {
  name     = "taco-truck"
  location = var.azure_region
}

The syntax to reference a variable is [.code]var.<name_label>[.code], making our reference [.code]var.azure_region[.code]. Go ahead and add the complete [.code]azure_region[.code] variable block to your [.code]main.tf[.code] file and update the [.code]location[.code] argument for the resource group.

Output Variables in Terraform

We may also want to get some information out of our Terraform code. We can do that with output variables, which are defined using- any guesses?- an output configuration block.

Let's say that we would like to get the public IP address of our container instance once the resource is created. We can do that by defining an output block like this:

output "public_ip_address" {
  value = azurerm_container_group.main.ip_address
  description = "Public IP address of the container instance."
}

The keyword for the block is [.code]output[.code] followed by a name label to identify the output. The only required argument inside the output block is a [.code]value[.code], since an output wouldn't be very useful if it had no value. I've also included a description to provide clarity around what the output is meant to contain.

When Terraform is done creating the container instance, it will populate the output variable, print it to the terminal, and save it to state data for later reference. Go ahead and add the output block to your configuration in the [.code]main.tf[.code] file.

That should just about finish our basic infrastructure configuration. Let's get this infrastructure as code deployed!

Terraform Workflow

Deploying infrastructure with Terraform follows a general workflow like this:
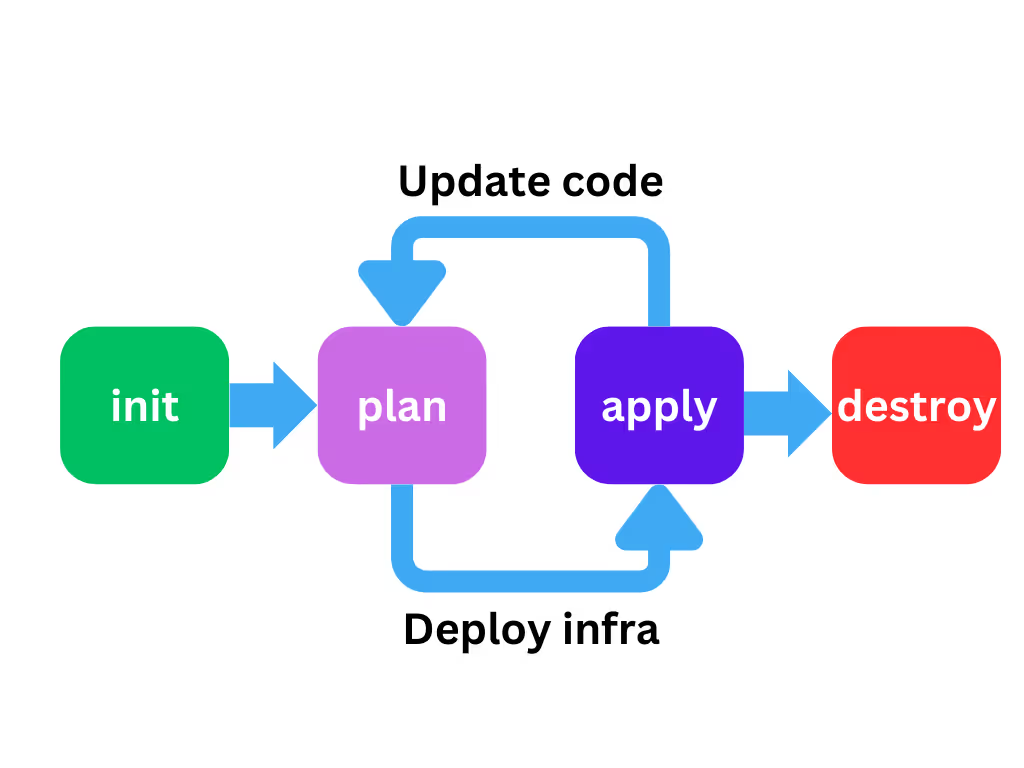
Terraform workflow init to plan to apply to destroy with a loop between plan and apply

In the first stage, Terraform is initialized with the [.code]init[.code] command to prepare the infrastructure code for deployment. Then an execution plan is generated with the [.code]plan[.code] command and verified to confirm the desired changes are included. Once the plan is approved, [.code]terraform apply[.code] uses providers to provision infrastructure in the target Terraform environment.

As the Terraform code is changed and updated, the plan and apply stages are repeated to validate and execute changes on the managed resources in the target Terraform Terraform environment to match what’s in the code.

If the resources are no longer needed- as is the case in a development or testing scenario- the [.code]destroy[.code] command can be used to delete all managed resources.

Initializing the Configuration

To prepare the code for deployment, Terraform performs several actions when the command [.code]terraform init[.code] is run. If we run the command from our [.code]azure_configuration[.code] directory, we'll see the following output:

output "public_ip_address" {
  value = azurerm_container_group.main.ip_address
  description = "Public IP address of the container instance."
}

The process starts by inspecting the configuration and discovering any providers we are using. The plugins for those providers are then downloaded into the [.code].terraform[.code] subdirectory of our configuration.

How does Terraform know where to get the provider plugins? By default, it looks on the public Terraform registry for provider plugins that match the resource types used in our code. We can be more explicit and specify a particular version to use by adding the following code to our [.code]terraform.tf[.code] file.

terraform {
  required_providers {
    azurerm = {
      source  = "hashicorp/azurerm"
      version = ">=3.60.0"
    }
  }
}

This set of configuration blocks tells Terraform where to get the [.code]azurerm[.code] provider and what version we would like to use for our configuration. In this case, we're okay with any version [.code]3.60.0[.code] or newer of the provider plugin.

During the initialization process, Terraform also prepares the backend for state data storage. We'll come back to state data in a moment.

Validating the Configuration

Before we try to generate an execution plan, we should probably check and make sure our code is valid and formatted properly. Terraform has two commands to help with this.

  • [.code]terraform fmt[.code] - formats the code in the current working directory to HashiCorp standards
  • [.code]terraform validate[.code] - checks the syntax and logic of the code for errors

Running both commands fixes any formatting in our files and verifies our code is valid.

azure_configuration $ terraform fmt
main.tf

azure_configuration $ terraform validate
Success! The configuration is valid.

Now we're ready to create an execution plan.

Previewing Changes

At this point your [.code]main.tf[.code] should look like this:

provider "azurerm" {
  features {}
}

resource "azurerm_resource_group" "main" {
  name     = "taco-truck"
  location = var.azure_region
}

resource "azurerm_container_group" "main" {
  name                = "taco-truck-app"
  location            = azurerm_resource_group.main.location
  resource_group_name = azurerm_resource_group.main.name
  ip_address_type     = "Public"
  os_type             = "Linux"

  container {
    name   = "truck-app"
    image  = "mcr.microsoft.com/azuredocs/aci-helloworld:latest"
    cpu    = "0.5"
    memory = "1.5"

    ports {
      port     = 80
      protocol = "TCP"
    }
  }
}

variable "azure_region" {
  type        = string
  description = "Azure region to use for resources. Defaults to eastus"
  default     = "eastus"
}

output "public_ip_address" {
  value       = azurerm_container_group.main.ip_address
  description = "Public IP address of the container instance."
}

Note the addition of a [.code]provider[.code] block for the [.code]azurerm[.code] provider at the beginning of the code. 

provider "azurerm" {
  features {}
}.

We can use the provider block to configure various aspects of the Azure provider. At a minimum the Azure provider requires that a nested features block is included. Each provider plugin will have different required and optional arguments available to configure the provider.

Also, you may notice that the input variable block comes after the resource block that references it. Because HCL is declarative in nature, it doesn’t care what order the blocks appear in. Terraform will create a dependency graph to determine the order in which to parse and apply the configuration.

When we run [.code]terraform plan[.code] command, we will be presented with an execution plan detailing the changes Terraform will make to the target environment infrastructure to match what's in our code. The truncated output is shown below.

azure_configuration $ terraform plan

Terraform used the selected providers to generate the following execution plan. Resource actions are indicated  
with the following symbols:
  + create

Terraform will perform the following actions:

  # azurerm_container_group.main will be created
  + resource "azurerm_container_group" "main" {
      + dns_name_label_reuse_policy = "Unsecure"
      + exposed_port                = (known after apply)
      + fqdn                        = (known after apply)
...

...
Plan: 2 to add, 0 to change, 0 to destroy.

Changes to Outputs:
  + public_ip_address = (known after apply)

We can save the execution plan to a file by using the [.code]-out=<filename>[.code] flag when running [.code]terraform plan[.code] command. The saved plan can be passed to the next phase when we run [.code]terraform apply[.code]. Otherwise, when the [.code]apply[.code] command is run Terraform will generate a new execution plan and prompt us to approve it.

Applying Changes

Terraform will never make changes to the target environment without having an execution plan to follow. You can think of the execution plan as a promise from Terraform to create, update, or destroy only what's in that plan.

Note: You didn't use the -out option to save this plan, so Terraform can't guarantee to take exactly these actions if you run "terraform apply" now.

Since we didn't save the execution plan from the previous step, running [.code]terraform apply[.code] will generate a fresh execution plan for us to approve.

azure_configuration $ terraform apply

Terraform used the selected providers to generate the following execution plan. Resource actions are indicated  
with the following symbols:
  + create

Terraform will perform the following actions:

  # azurerm_container_group.main will be created
  + resource "azurerm_container_group" "main" {
      + dns_name_label_reuse_policy = "Unsecure"
      + exposed_port                = (known after apply)
      + fqdn                        = (known after apply)
...

...
Plan: 2 to add, 0 to change, 0 to destroy.

Changes to Outputs:
  + public_ip_address = (known after apply)

Do you want to perform these actions?
  Terraform will perform the actions described above.
  Only 'yes' will be accepted to approve.

  Enter a value:

Once we approve the plan by entering "yes", the resource group and container instance will be created and the public IP address of the instance will be printed to the terminal window.

Apply complete! Resources: 2 added, 0 changed, 0 destroyed.

Outputs:

public_ip_address = "4.156.160.244"

If we visit the public IP address from the output, we'll see the follow webpage:
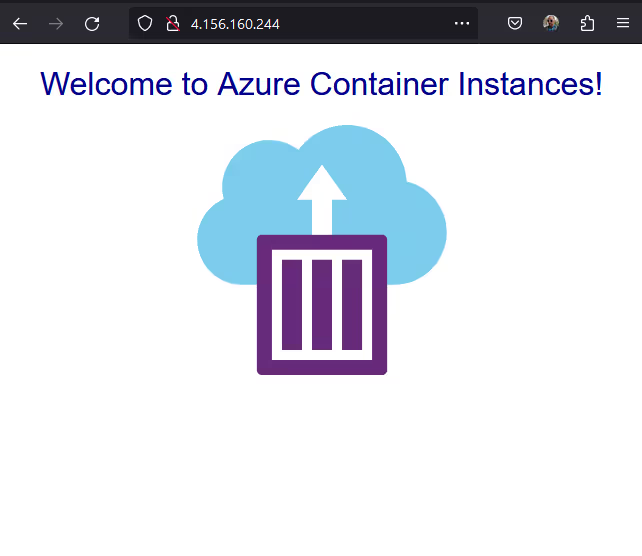
Azure Container Instances hello world page

Sweet!

Managing State Data

Looking at the [.code]azure_configuration[.code] directory, you'll see several new files and a new folder.

azure_configuration
│   .terraform.lock.hcl
│   main.tf
│   terraform.tf
│   terraform.tfstate
│
└───.terraform
  • [.code].terraform.lock.hcl[.code] - is generated when Terraform initializes to record provider versions
  • [.code].terraform[.code] - stores the provider plugin files
  • [.code]terraform.tfstate[.code] - stores the state data for this deployment

We've covered provider plugins in some detail already, but what is this mysterious state file?

What is Terraform State?

When you deploy infrastructure with Terraform, it needs some way of tracking which resources are being managed by Terraform and their properties. Terraform does this by creating state data that maps the resource identifier in the code to a unique identifier of the managed resource.

For example, our Azure resource group has a resource identifier of [.code]azurerm_resource_group.main[.code] inside our configuration, which maps to the Resource ID of the actual resource group in Azure.

Within the state data entry for our resource group is a listing of its attributes. We can view them by using the [.code]terraform state show[.code] command.

Without state data, Terraform would not be able to continue managing resources beyond their initial deployment. State data is quite literally the glue that binds the code to the target environment.

We can see this in action by making a change to our code, and seeing the change reflected in the execution plan.

Deploying Configuration Updates

We didn't add any tags to our resource group! Let's fix that now by updating the resource block:

resource "azurerm_resource_group" "main" {
  name     = "taco-truck"
  location = var.azure_region
  tags = {
    environment = "dev"
  }
}

Now we can run a [.code]terraform apply[.code] and preview the changes that Terraform will make.

azure_configuration $ terraform apply
azurerm_resource_group.main: Refreshing state... 
[id=/subscriptions/XXXX-XXXX-XXXX/resourceGroups/taco-truck]

Before Terraform plans out the changes, it loads the state data and refreshes its values using the mapping of managed resources.

Then it details the planned changes to our infrastructure, which unsurprisingly is adding the [.code]environment[.code] varriable tag to our resource group.

# azurerm_resource_group.main will be updated in-place
  ~ resource "azurerm_resource_group" "main" {
        id       = "/subscriptions/XXXX-XXXX-XXXX/resourceGroups/taco-truck"
        name     = "taco-truck"
      ~ tags     = {
          + "environment" = "dev"
        }
        # (1 unchanged attribute hidden)
    }

Plan: 0 to add, 1 to change, 0 to destroy.

Once you approve the plan, Terraform will make the necessary changes and write the results to the state data.

At this point, we're done with the example. You can run [.code]terraform destroy[.code] to remove the deployed resources. Just like the apply command, an execution plan to delete all resources will be generated and you will be prompted to approve the plan before Terraform makes any changes to your infrastructure.

Since Terraform cannot function without state data, if you don't specify a location to store state data, it will create the file [.code]terraform.tfstate[.code] in the current directory and store the state data there. Such behavior makes it easy to get started with Terraform, but it's not a good idea for any kind of production environment.

State Storage Backends

Aside from the default local backend, Terraform supports many remote backend options, like Azure Storage, Terraform Cloud, and env0. Moving to a remote backend has many advantages over the local backend:

  • Resiliency - Using a local state file exposes you to possible data loss if the drive is corrupted or the device is lost. Remote backends are generally designed with data protection and durability in mind.
  • Security - State files can hold sensitive information. Storing that information on an unsecured device can present a potential security risk. Remote backends can apply access controls and encryption at rest and in transit.
  • Collaboration - Using a local state file only allows a single person to work on the state data and environment at a time. Moving to a remote backend enables a team to collaborate while keeping state in sync and preventing simultaneous changes.

Working with Multiple Environments

Each instance of state data represents a mapping between the code and exactly one environment. The same Terraform code could be used to deploy infrastructure to multiple environments by toggling to a different instance of state data.

Terraform includes support for multiple environments through the use of workspaces in the core binary. This functionality is intended to support short-lived environments that are being leveraged for testing.

To support long-term environments and additional flexibility, there are many options beyond Terraform workspaces. A common pattern is to use automation and code branches to manage multiple deployments from the same code base. Another popular option is to use environment specific directories in the same code base, each referencing a common set of modules.

Using the same code base for multiple environments helps to enhance consistency, security, and reliability. Updating and testing your Terraform code in a lower environment and then promoting it to your production environment can help improve uptime and limit surprises when a change is implemented.

Best Practices and Further Reading

We've just barely scratched the surface when it comes to Terraform, but before you head out on your voyage of infrastructure as code discovery, here are a few quick tips and best practices to consider when writing terraform code:

  • Writing Reusable Code - Terraform uses modules to package up logical groupings of infrastructure. Check out the public registry for examples and modules you can use today.
  • Version Control Considerations - HashiCorp generally recommends a single repository per module or configuration. Avoid trying to overpack your repository with multiple environments or overly complex architectures.
  • Sensitive Data - Terraform stores attribute values in state data, which may include sensitive information. Always store state data in a secure location and protect it with proper access controls.
  • Security Considerations - Your Terraform code and execution plans can be scanned to identify security issues and compliance violations. Check out some of the analysis tools out there to proactively protect your infrastructure as code.
  • Testing Updates - Proper testing of your infrastructure as code is a massive topic. With Terraform, you can execute unit tests, sanity tests, and integration tests with a variety of different tools. A good place to start is with Terratest from the good folks at Gruntwork.

Conclusion

There's a reason Terraform is consistently ranked as one of the most popular DevOps tools out there for managing infrastructure. In this tutorial we covered the following:

  1. Installing Terraform and using the Azure CLI
  2. Creating declarative configuration files
  3. Creating resources, variables, and outputs
  4. Initializing a terraform provider with Microsoft Azure
  5. Running a terraform plan command and reviewing the results
  6. Using terraform apply to run the execution plan
  7. Inspecting state data and the importance of remote backends

I hope you've found this tutorial helpful. You can find the full example code on my GitHub repository. There's still plenty more to learn! Keep an eye out for future posts that dig into some of the best practices and advanced topics referenced above.

Logo Podcast
With special guest
Andrew Brown

Schedule a technical demo. See env0 in action.

Footer Illustration