What is Terragrunt?

Terragrunt is a thin wrapper for Terraform that provides extra tools for keeping your Terraform configurations DRY (Don't Repeat Yourself). With Terragrunt, you can easily manage remote states and multiple environments. It also helps you keep your codebase clean and organized.

Why use Terragrunt?

There are several reasons to use Terragrunt over just using pure Terraform code. Below is a list of these and we will elaborate more under the Terragrunt Features section.

  1. DRY code and configurations
  2. Versioning and environment management
  3. Dependency management
  4. Hooks for custom actions
  5. Keep your remote state configuration DRY
  6. Keep your CLI flags DRY
  7. Execute Terraform commands on multiple modules at once
  8. Work with multiple AWS accounts

Getting Started with Terragrunt

Video Walk-through

Requirements: A GitHub account (all the hands-on sections will utilize GitHub’s Codespaces so you won’t need to install anything on your machine)

TL;DR: You can find the repo here.

Installing Terragrunt

To install Terragrunt, download the binary for your operating system from the Releases Page and add it to your PATH. Alternatively, you could use a package manager as shown here. If you're following along with us with codespaces, you will have all the binaries already installed for you.

Basic Terragrunt Commands

Instead of running Terraform commands directly, you run the same commands with Terragrunt:

These commands will call the corresponding Terraform commands, with Terragrunt performing additional logic before and after the Terraform calls.

Using Terragrunt for Infrastructure Management

Terragrunt can be used to manage your infrastructure configurations, plans, and Terraform backend. You can define your Terragrunt configuration in a terragrunt.hcl file, which allows you to reference specific versions of your Terraform modules and fill in variables specific to each environment. We will see an example later.

Terragrunt Features

Let's now elaborate more on the key features that Terragrunt offers:

  1. DRY code:
    Terragrunt helps you avoid duplicating code by allowing you to define common input variables and environment-specific variables.
  2. Infrastructure management:
    Terragrunt simplifies the management of multiple environments by providing a clear separation between them.
  3. Versioning:
    Terragrunt allows you to reference specific versions of your Terraform modules for each environment, making it easier to manage and roll back changes.
  4. Hooks:
    Terragrunt supports hooks that can be used to perform actions before or after Terraform commands.
  5. Keep your remote state configuration DRY:
    Terragrunt allows you to define your backend block once in a root terragrunt.hcl file and inherit it in all your Terraform environments. Terragrunt can also automatically create the remote state and locking resources (such as S3 buckets and DynamoDB tables) for you.
  6. Keep your CLI flags DRY:
    You can configure Terragrunt to pass specific CLI arguments for specific commands using an
    block in your terragrunt.hcl file.
  7. Execute Terraform commands on multiple modules at once:
    Instead of manually running [.code]terraform apply[.code] in each of the subfolders corresponding to different environments and waiting for them to complete, you can use Terragrunt with the [.code]run-all[.code] command to deploy multiple Terraform modules at once.
  8. Work with multiple AWS accounts:
    Terragrunt allows you to work with multiple AWS accounts by letting you specify the IAM role to assume for each account. You can use the [.code]--terragrunt-iam-role[.code] command line argument or the TERRAGRUNT_IAM_ROLE environment variable to tell Terragrunt which role to use. Terragrunt will then call the sts assume-role API on your behalf and expose the credentials it gets back as environment variables when running Terraform. This way, you can manage your infrastructure in different accounts without having to store your AWS credentials in plaintext on your hard drive, without having to manually call assume-role every time, and without having to modify your Terraform code or backend configuration

Terragrunt Workflow and Best Practices

To make the most of Terragrunt, follow these best practices:

  • Structuring Configurations: Organize your Terraform code into modules and use Terragrunt to reference these modules with specific versions.
  • Managing Dependencies: Use Terragrunt to manage dependencies between your infrastructure components.
  • Using Terragrunt Hooks: Utilize hooks to perform actions before or after Terraform commands.
  • Automation with CI/CD: Integrate Terragrunt with your CI/CD pipeline for automated infrastructure deployment.

Terragrunt Benefits and Drawbacks

While Terragrunt offers many benefits, it also has some drawbacks, such as:

  • It adds an additional layer of complexity to your infrastructure management and may require more initial setup.
  • It is also another tool to manage
  • Doesn't work with Terraform Cloud

However, if you are using env0, you can make full use of Terragrunt's benefits because env0 is one of the few tools that support Terragrunt.

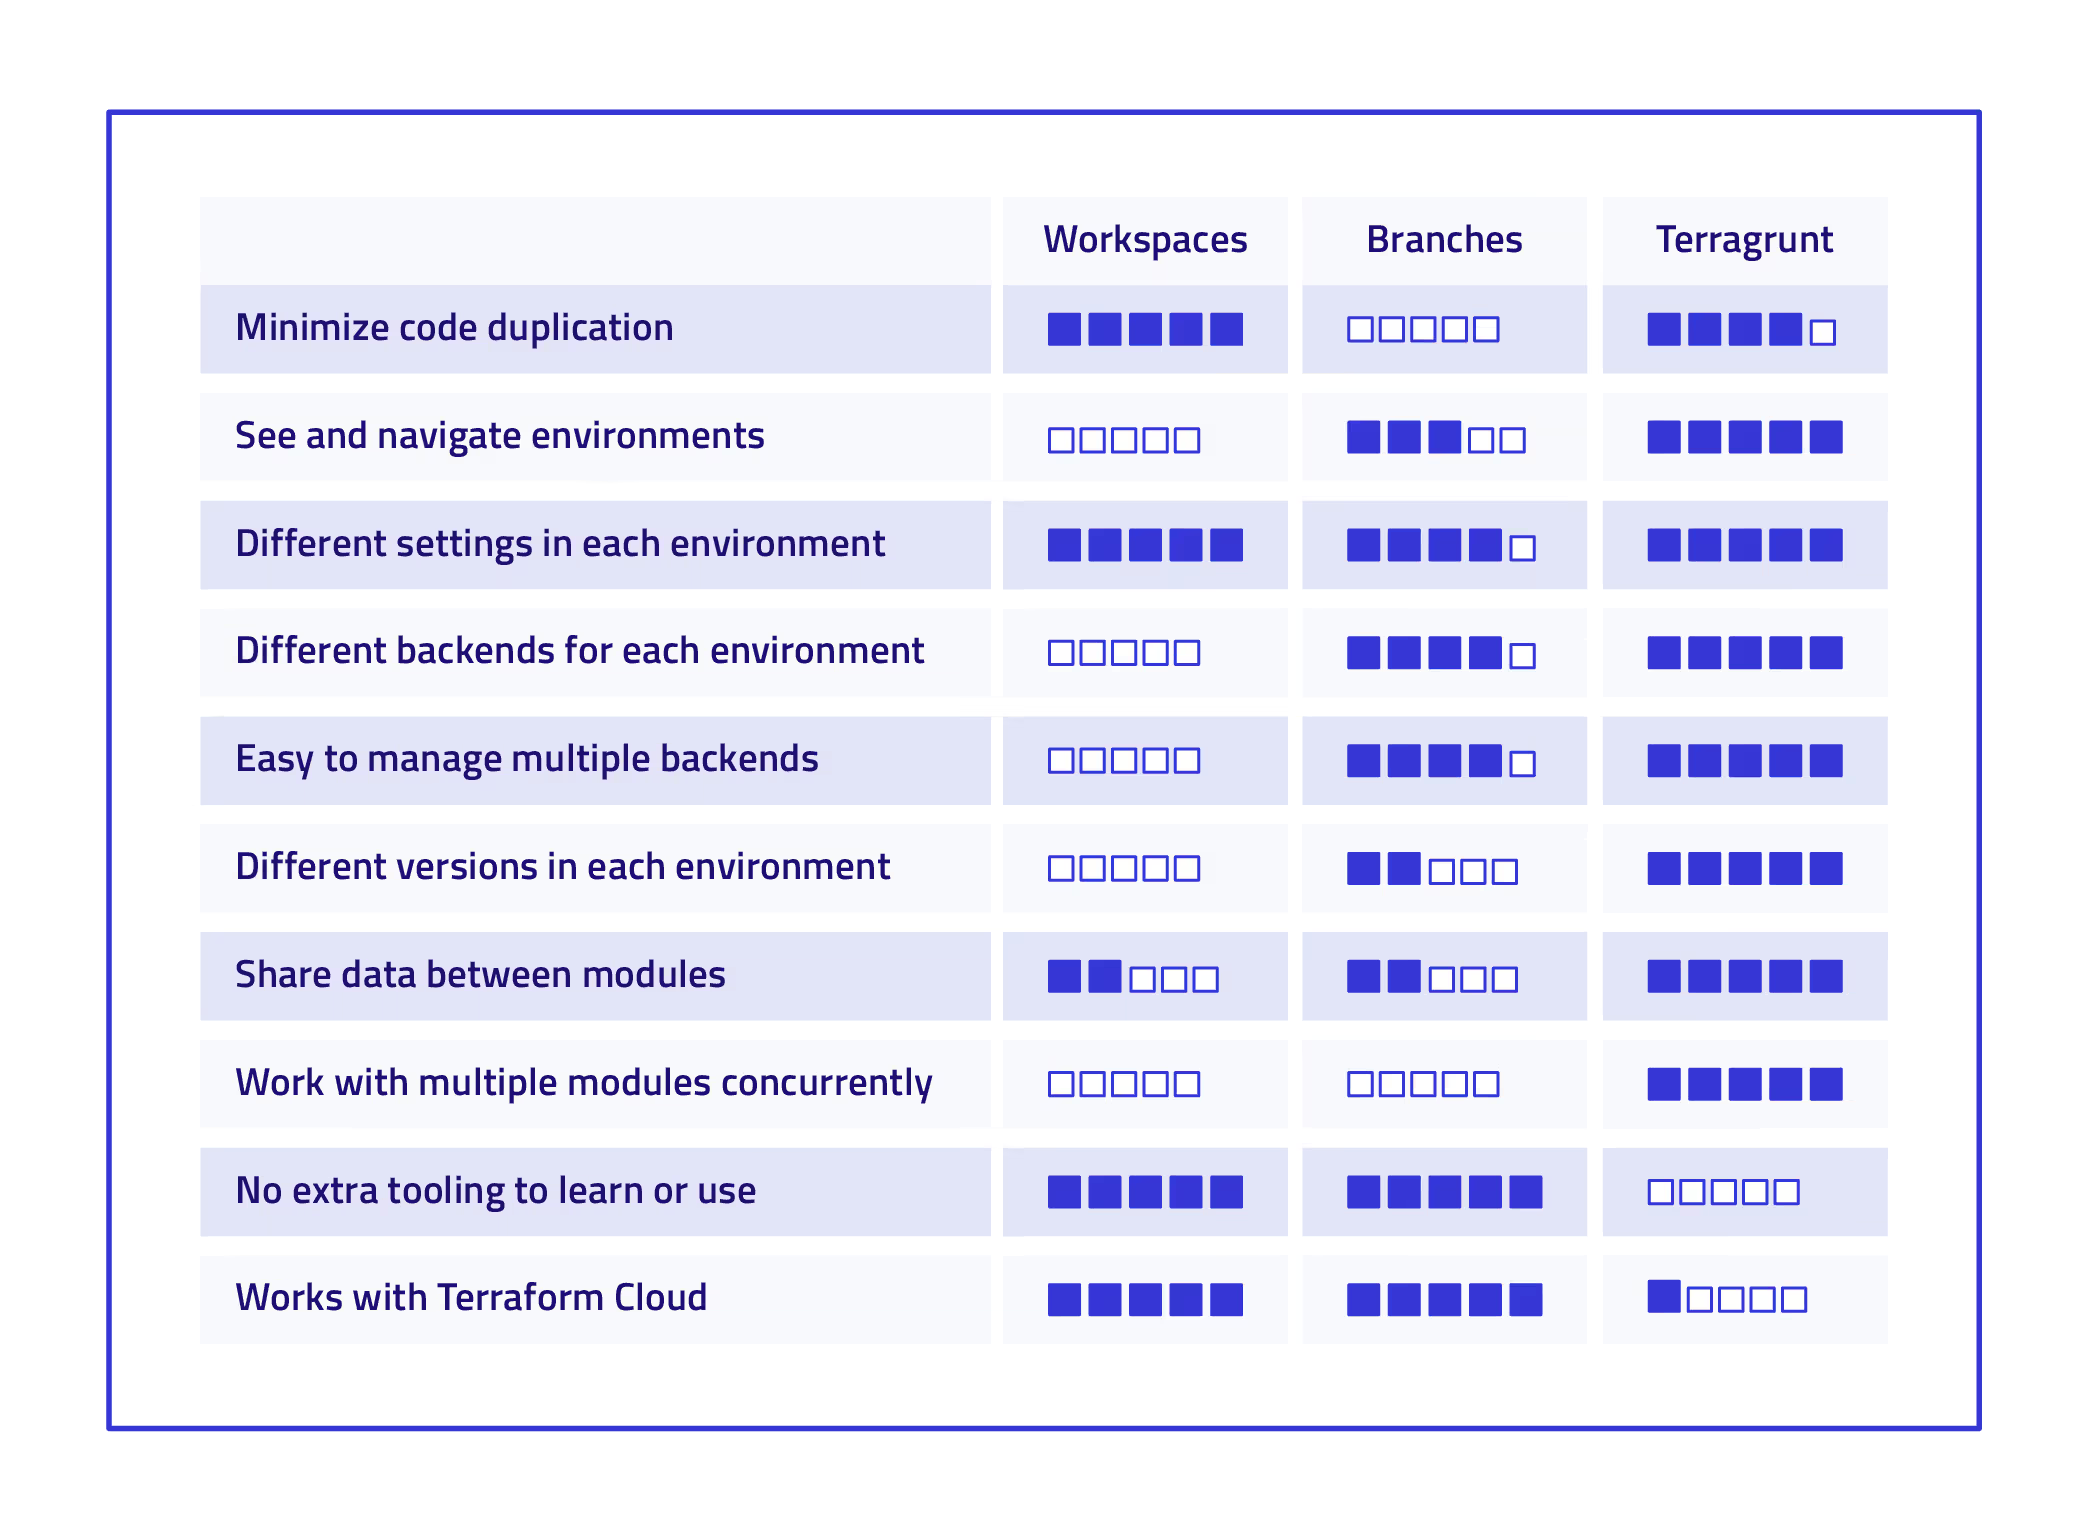
Yevgeniy Brikman, who is the co-founder of Gruntworks (the company that brought us Terragrunt), makes a great comparison between using Terraform workspaces, Git branches, and Terragrunt. He summed up his comparison with the table below:
Terragrunt Use Cases and Examples

Terragrunt can be used in various scenarios, such as managing infrastructure for different environments like development, staging, and production. In our example, we will see how to use Terragrunt to DRY out our Terraform configuration. We will first run everything with pure Terraform only then we will see how to improve our configuration using Terragrunt.

Furthermore, to keep things simple, we will only consider two environments: dev and prod.

Our WordPress Module

We will use an example WordPress application to showcase the difference between using pure Terraform only and using Terragrunt. This example was taken from this repo, but modified slightly to fit our needs. The WordPress Terraform module creates the following resources:

  • A VPC
  • 1 Public Subnet for the EC2 instance
  • 2 Private Subnets for the RDS
  • An Internet Gateway
  • A route table
  • Security groups for EC2 and RDS
  • EC2 instance for the WordPress application
  • RDS instance for the MySQL database for WordPress

You can check the Terraform code in our repo.

Terraform Only Scenario

Below is the folder structure when using Terraform only.


├── environments
│   ├── dev
│   │   ├── main.tf
│   │   └── outputs.tf
│   └── prod
│       ├── main.tf
│       └── outputs.tf
└── modules
    └── wordpress
        ├── aws_ami.tf
        ├── main_script.tf
        ├── outputs.tf
        ├── user_data.tpl
        ├── userdata_ubuntu.tpl
        ├── variables.tf
        └── versions.tf

Under each environment folder, you can see that we're duplicating code in both the main.tf and the outputs.tf files. Even though we are using a terraform module structure, we still duplicate the code unnecessarily. Recall that using terraform modules is a great way for code reuse.

Below is the content of the main.tf file for the dev environment.


 terraform {
  backend "s3" {
    bucket         = "tekanaid-terragrunt-demo"
    key            = "wordpress/dev/terraform.tfstate"
    region         = "us-east-1"
    encrypt        = true
    dynamodb_table = "my-lock-table"
  }
}

module aws_wordpress {
    source              = "../../modules/wordpress"
    database_name           = "wordpress_db"   // database name
    database_user           = "wordpress_user" //database username
    database_password = "dev-PassWord4-user" //password for user database
    region                  = "us-east-1" 
    IsUbuntu                = true             
    AZ1          = "us-east-1a" // for EC2
    AZ2          = "us-east-1b" //for RDS 
    AZ3          = "us-east-1c" //for RDS
    VPC_cidr     = "10.0.0.0/16"     // VPC CIDR
    subnet1_cidr = "10.0.1.0/24"     // Public Subnet for EC2
    subnet2_cidr = "10.0.2.0/24"     //Private Subnet for RDS
    subnet3_cidr = "10.0.3.0/24"     //Private subnet for RDS
    PUBLIC_KEY_PATH  = "./mykey-pair.pub" 
    PRIV_KEY_PATH    = "./mykey-pair"
    instance_type    = "t2.micro"    //type of instance
    instance_class   = "db.t2.micro" //type of RDS Instance
    root_volume_size = 22
}

Below is the content of the main.tf file for the prod environment.


terraform {
  backend "s3" {
    bucket         = "tekanaid-terragrunt-demo"
    key            = "wordpress/prod/terraform.tfstate"
    region         = "us-east-1"
    encrypt        = true
    dynamodb_table = "my-lock-table"
  }
}

module aws_wordpress {
    source              = "../../modules/wordpress"
    database_name           = "wordpress_db"   // database name
    database_user           = "wordpress_user" //database username
    database_password = "prod-PassWord4-user" //password for user database
    region                  = "us-east-2" 
    IsUbuntu                = true             
    AZ1          = "us-east-2a" // for EC2
    AZ2          = "us-east-2b" //for RDS 
    AZ3          = "us-east-2c" //for RDS
    VPC_cidr     = "10.10.0.0/16"     // VPC CIDR
    subnet1_cidr = "10.10.1.0/24"     // Public Subnet for EC2
    subnet2_cidr = "10.10.2.0/24"     //Private Subnet for RDS
    subnet3_cidr = "10.10.3.0/24"     //Private subnet for RDS
    PUBLIC_KEY_PATH  = "./mykey-pair.pub"
    PRIV_KEY_PATH    = "./mykey-pair"
    instance_type    = "t2.small"    //type of instance
    instance_class   = "db.t2.small" //type of RDS Instance
    root_volume_size = 22
}

There are two main factors to notice between the two main.tf files:

  1. The backend configuration is different and it is quite error-prone to copy and paste the key in this configuration. You may accidentally use the prod state file in dev and vice versa. You may also override an existing state file. Variables are not allowed to be used in the backend configuration block.
  2. Some of the input variables to the aws_wordpress module are duplicated. In this example, it might not be a big deal, however, when you have multiple terraform modules you will start to see the difference.

Now let's take a look at the output variables in the outputs.tf file for the dev environment:


 output "IP" {
  value = module.aws_wordpress.IP
}

output "RDS-Endpoint" {
  value = module.aws_wordpress.RDS-Endpoint
}

output "INFO" {
  value = module.aws_wordpress.INFO
}

Notice that they are exactly the same. So again this is violating the DRY principle and it becomes worse when you have many other environments and applications.

Deploy with Terraform only

Follow the instructions below to deploy the WordPress application using pure Terraform code only.

In the Terraform_Only/environments/dev folder create a private/public key pair with an empty passphrase:

ssh-keygen -f mykey-pair
sudo chmod 400 mykey-pair

In order to create a remote backend to store Terraform state files, you will need to create an S3 bucket and a Dynamo DB table in AWS. This is a good guide.

Run these Terraform commands:

terraform init
terraform plan
terraform apply

To deploy the production Wordpress application, run the same steps above but in the Terraform_Only/environments/prod folder.

Here is the output of the [.code]terraform apply[.code] command:

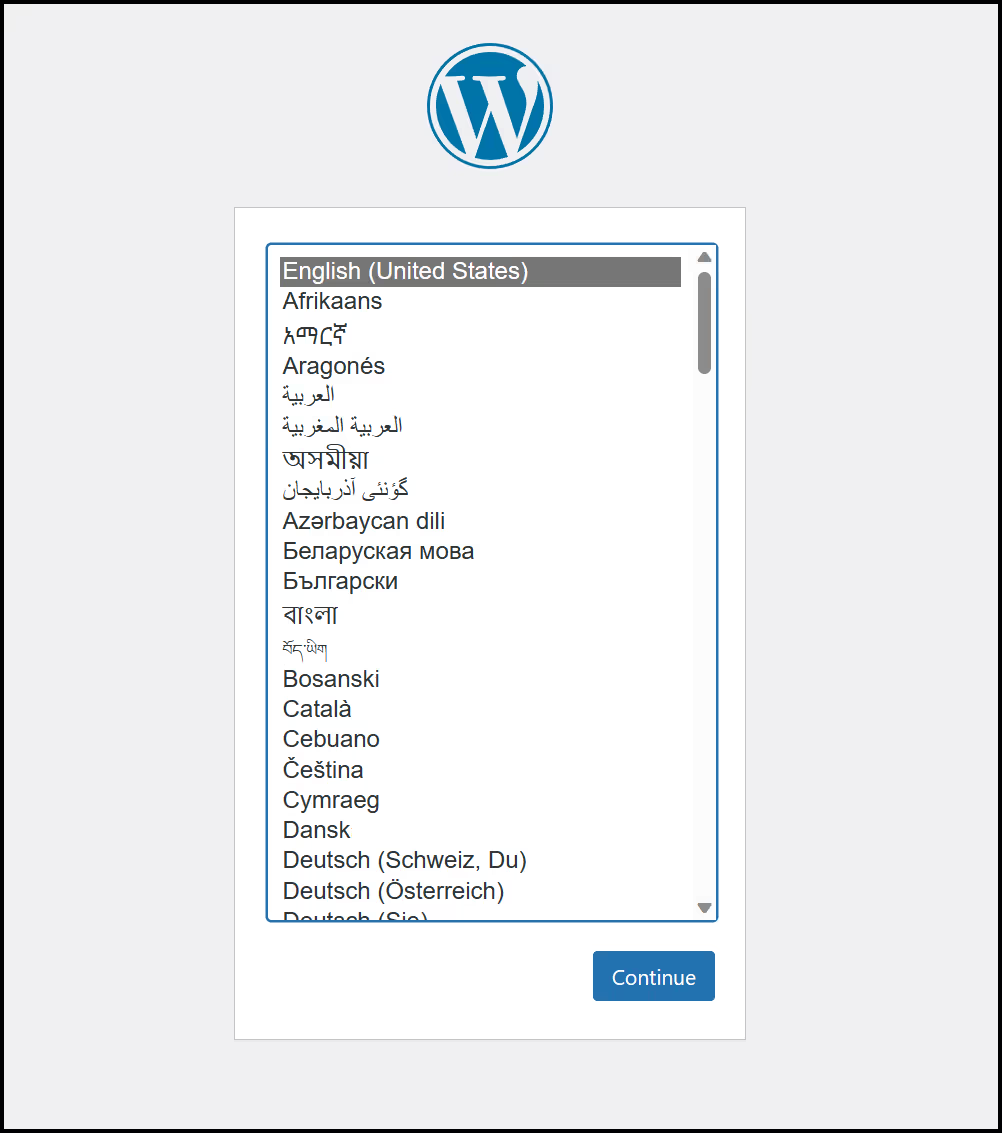
And going to the 'http://54.167.129.51' address shows you the WordPress setup screen:
Terragrunt Scenario

Now let's take a look at how Terragrunt can improve our Terraform code structure.

Below is the folder and file structure in our local file system, when using Terragrunt. Notice that we have a root terragrunt.hcl configuration file and a terragrunt.hcl configuration file per environment folder.


├── environments
│   ├── dev
│   │   └── terragrunt.hcl
│   ├── prod
│   │   └── terragrunt.hcl
│   └── terragrunt.hcl
└── modules
    └── wordpress
        ├── aws_ami.tf
        ├── main_script.tf
        ├── outputs.tf
        ├── user_data.tpl
        ├── userdata_ubuntu.tpl
        ├── variables.tf
        └── versions.tf

The Root Terragrunt Configuration File

Now let's take a look at the main or root Terragrunt configuration file called terragrunt.hcl just under the environments folder.

remote_state {
  backend = "s3"
  config = {
    bucket         = "tekanaid-terragrunt-demo"
    key            = "terragrunt/wordpress/${path_relative_to_include()}/terraform.tfstate"
    region         = "us-east-1"
    encrypt        = true
    dynamodb_table = "my-lock-table"
  }
}

inputs = {
  ami_id        = "ami-0c55b159cbfafe1f0" # Amazon Linux 2 AMI
  database_name = "wordpress_db"          // database name
  database_user = "wordpress_user"        //database username
  IsUbuntu          = true 
  PUBLIC_KEY_PATH  = "./mykey-pair.pub" 
  PRIV_KEY_PATH    = "./mykey-pair"
  root_volume_size = 22
}

Notice how the [.code]key[.code] in the remote_state block is parameterized. Each environment folder will have its own key without us worrying about copying and pasting. So the dev environment's key will be:

terragrunt/wordpress/dev/terraform.tfstate 


Whereas the prod environment's key will be:

terragrunt/wordpress/prod/terraform.tfstate 

The second thing to notice is that we define the input variables that are common to all our environments here. Once again this shows how we are following the DRY principle.

Now let's take a look at the dev Terragrunt configuration files under both the environments/dev and the environments/prod folders.

Below is the terragrunt.hcl file under the environments/dev folder.


include {
  path = find_in_parent_folders()
}

terraform {
  source = "../../modules//wordpress"
}

inputs = {
  database_password = "dev-PassWord4-user" //password for user database
  region            = "us-east-1"
  AZ1              = "us-east-1a"       // for EC2
  AZ2              = "us-east-1b"       //for RDS 
  AZ3              = "us-east-1c"       //for RDS
  VPC_cidr         = "10.0.0.0/16"      // VPC CIDR
  subnet1_cidr     = "10.0.1.0/24"      // Public Subnet for EC2
  subnet2_cidr     = "10.0.2.0/24"      //Private Subnet for RDS
  subnet3_cidr     = "10.0.3.0/24"      //Private subnet for RDS
  instance_type    = "t2.micro"    //type of instance
  instance_class   = "db.t2.micro" //type of RDS Instance
}

and below is the terragrunt.hcl under the environments/prod folder.


include {
  path = find_in_parent_folders()
}

terraform {
  source = "../../modules//wordpress"
}

inputs = {
  database_password = "prod-PassWord4-user" //password for user database
  region            = "us-east-2"
  AZ1             = "us-east-2a"       // for EC2
  AZ2             = "us-east-2b"       //for RDS 
  AZ3             = "us-east-2c"       //for RDS
  VPC_cidr        = "10.10.0.0/16"     // VPC CIDR
  subnet1_cidr    = "10.10.1.0/24"     // Public Subnet for EC2
  subnet2_cidr    = "10.10.2.0/24"     //Private Subnet for RDS
  subnet3_cidr    = "10.10.3.0/24"     //Private subnet for RDS
  instance_type   = "t2.small"    //type of instance
  instance_class  = "db.t2.small" //type of RDS Instance
}

In both the dev and prod Terragrunt configuration files you can see that we're including the inputs from the root Terragrunt config file using the [.code]find_in_parent_folders()[.code] function.

We're also including the input variables that are specific to each environment. This is as DRY as it gets.

The second thing to notice is the source attribute inside the terraform block. Here we are referencing the Terraform module Wordpress that exists two levels above inside the modules folder. It's also possible to reference a terraform module that lives in a git repository, which is actually a more realistic pattern. In this case, another benefit of using Terragrunt is that you can source different versions of all the Terraform modules for different environments. For example, the dev environment may be running on version v0.0.2 of our Wordpress module whereas the prod environment is still on version v0.0.1. Once the dev environment has been properly tested you can then upgrade the prod environment to version v0.0.2. With pure Terraform, you can't parameterize the source block rendering all environments running with the same version of the module unless you hard-code the version values.

Deploy with Terragrunt

Follow the instructions below to deploy the WordPress application using pure Terraform code only.

In the Terragrunt/environments/dev folder create a private/public key pair with an empty passphrase:

ssh-keygen -f mykey-pair
sudo chmod 400 mykey-pair

Then run the following Terragrunt commands:

terragrunt init
terragrunt plan
terragrunt apply

Terragrunt sets the AWS remote backend for you. It will create an S3 bucket and a Dynamo DB table.

To deploy the production WordPress application, run the same steps above but in the Terragrunt/environments/prod folder.

Here is the output of the [.code]terragrunt apply[.code] command:

Notice the Terragrunt output is exactly the same as the previous Terraform only scenario except that we didn't need to define an outputs.tf file to output the variables from the module. Terragrunt did it for us for free.

And going to the URL shows you the same WordPress setup screen that we saw earlier.

Terragrunt Cache

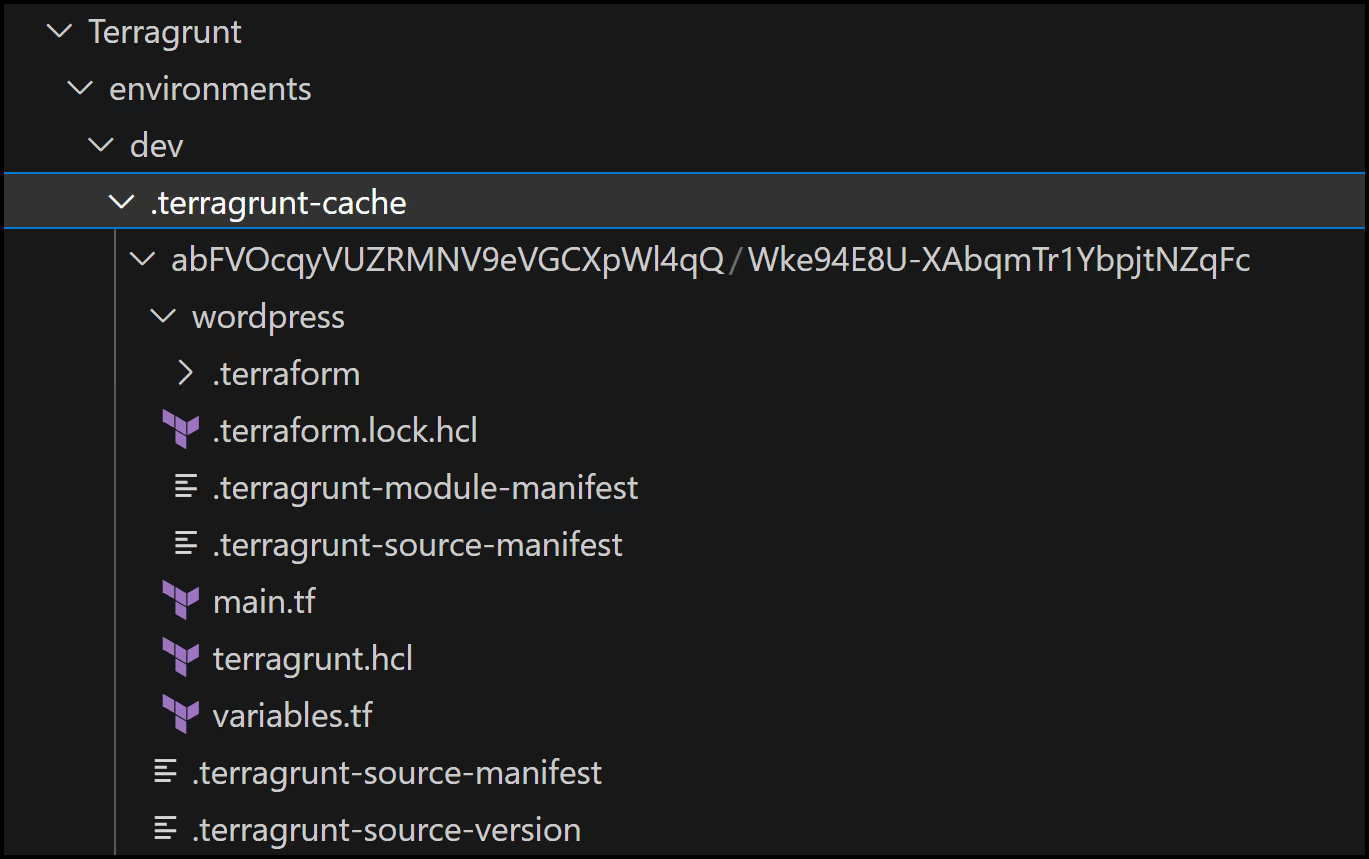
The Terragrunt cache is a folder that Terragrunt creates in the current working directory to store the downloaded Terraform configurations, modules, providers, and backend settings. Terragrunt uses this cache to avoid downloading the same code multiple times and to speed up the execution of Terraform commands. You can safely delete this folder at any time and Terragrunt will recreate it as necessary. You can also change the location of this folder by setting the [.code]TERRAGRUNT_DOWNLOAD[.code] environment variable. Here is what it looks like
Cleanup and the run-all command

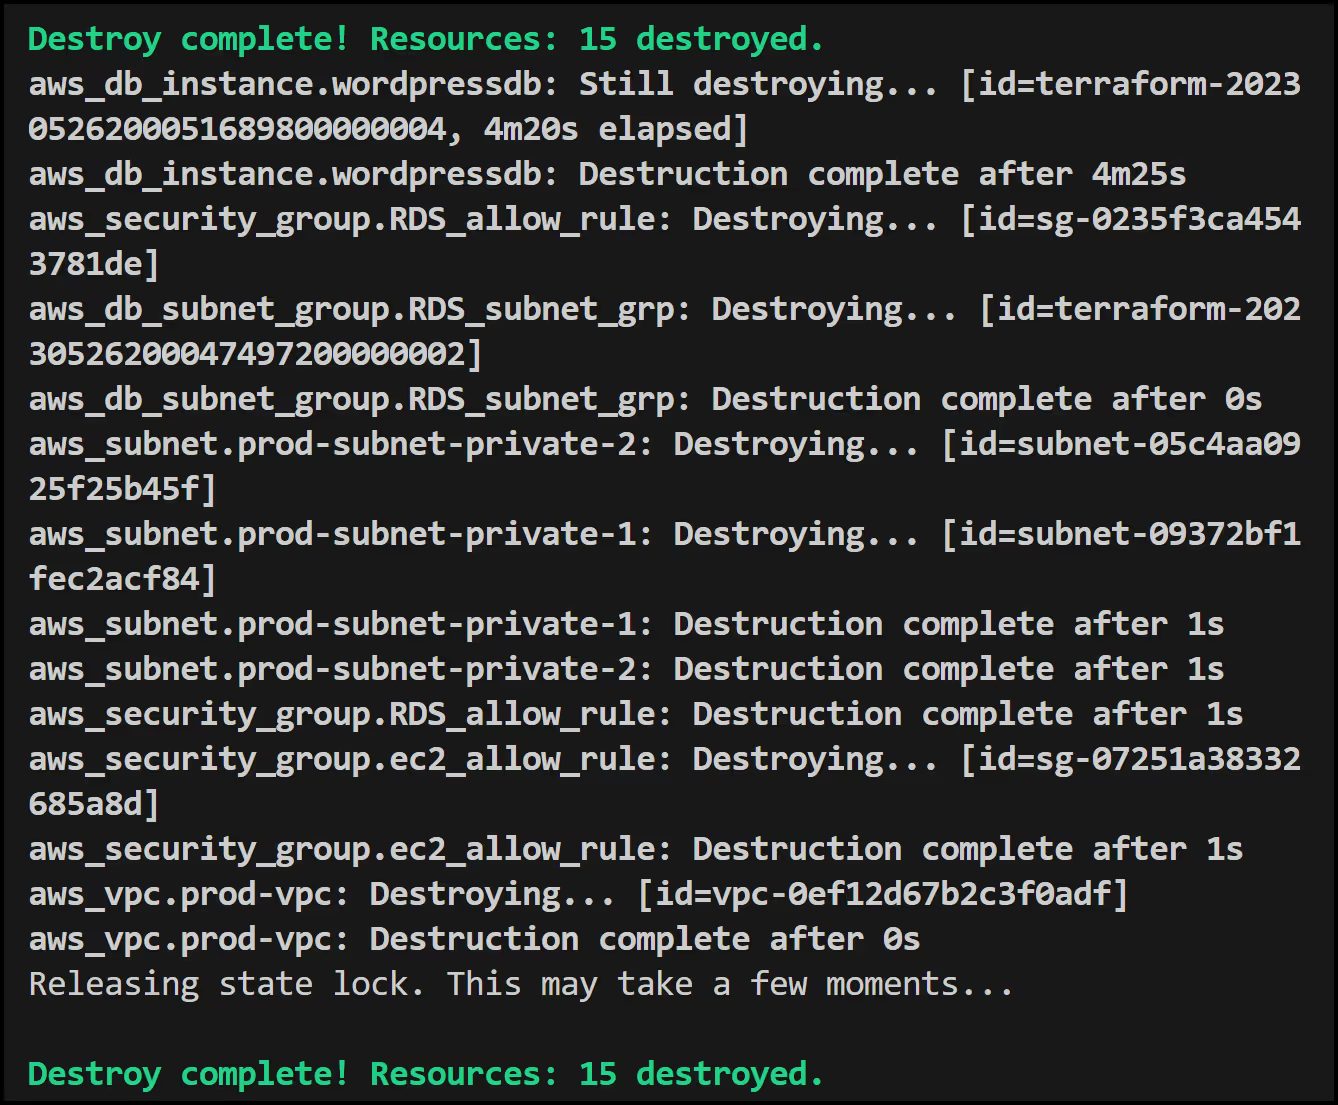
Terragrunt has a neat feature that allows you to run commands across multiple folders. In our case we will run the following command to destroy the dev and prod environments in parallel from within the Terragrunt/environments folder:


terragrunt run-all destroy

Below is the output showing both the dev and prod environments destroyed successfully.
Terragrunt with env0

As we've seen, Terragrunt offers several benefits over Terraform and helps to address some of the challenges inherent to Terraform implementations. Since Terragrunt is built on top of Terraform, it also benefits from env0 management.

When you use env0 in conjunction with Terragrunt, you get the following benefits:

  • Automate your Terragrunt deployments in CI pipelines for Infrastructure as Code.
  • Manage your Terragrunt variables centrally and securely.
  • Integrate your Terragrunt-based environments with other environments managed by different IaC tools.
  • Combine multiple Terragrunt deployments to create more sophisticated environments.
  • Use [.code]Terragrunt run-all[.code] to execute commands on multiple modules efficiently and reliably.
  • Manage your underlying Terraform state safely and easily.
  • Increase the reusability and extensibility of your Terragrunt deployments.

Key Takeaways

Terragrunt is a powerful tool that enhances the Terraform experience by providing DRY code, versioning, dependency management, and hooks, among other features. By following best practices and leveraging Terragrunt's features, you can create a more efficient and maintainable infrastructure management process in large-scale deployments. Combine env0 with Terragrunt and you can unleash the full potential of your Infrastructure as Code strategy.

References

Logo Podcast
With special guest
Andrew Brown

Schedule a technical demo. See env0 in action.

Footer Illustration