.webp)


Overview:
When using infrastructure as code (IaC) on a public cloud provider, it’s important to use tags and labels to organize your IaC resources using their complementary services. Terratag, an open source project developed by env0, can be used with Terraform and placed on the Github Actions, making tagging and labeling IaC easier and more efficient.
GitHub Actions, Terraform, and Terratag make it easy to tag and label infrastructure as code.
Terraform is the most widely adopted IaC framework out there. It’s an open source project that’s maintained by HashiCorp, and was launched in 2014 based on HashiCorp configuration language (HCL). It’s a CLI tool that can help manage and provision external resources such as public cloud infrastructure, private cloud infrastructure, network appliances, and SaaS and PaaS vendors. All major clouds are supported where AWS, Azure and GCP have an official provider that is maintained internally by the HashiCorp Terraform team.
GitHub Actions makes it easy to automate your IaC workflows. You can deploy your code right from GitHub, and use the GitOps methodology for streamlining your infrastructure deployment.
All major cloud providers support tagging/labeling for most of their resources using their Terraform provider, to help users manage infrastructure more efficiently. In this blog post, we provide some examples that show how easy it is to tag and label your IaC resources using Terratag with GitHub Actions.
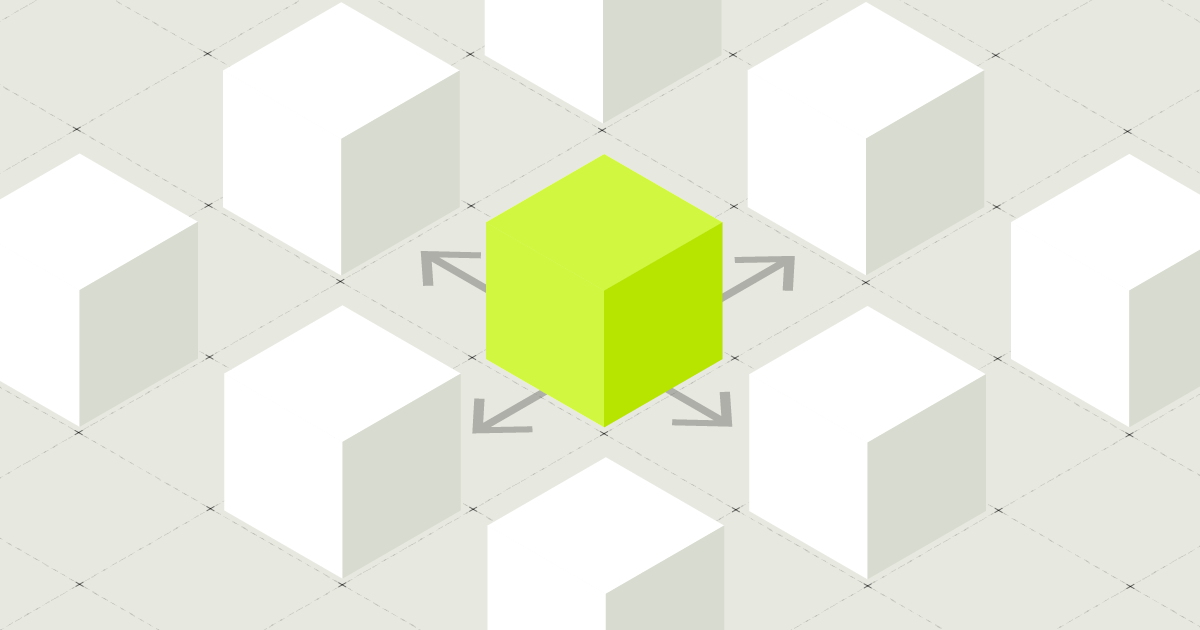
Why tags / labels are so important
All major cloud providers encourage you to tag/label so you get the most out of their complementary services which allow you to manage budgets, set up powerful automation algorithms, and unlock insights offered both by the cloud providers themselves and independent third parties.
Harnessing powerful infrastructure-as-code frameworks such as Terraform to define and tag your cloud resources allows for useful dynamic tag applications on various verticals from technical and operations to business needs.
The problem with tagging today
As your infrastructure grows, the need to repeat the manual process of tagging over and over for dozens or even hundreds of cloud resources can become a real hassle. But that’s just the tip of the iceberg. Manual tagging processes fail in other important ways:
- Standards are hard to maintain if they’re not enforced — Your entire team needs to be onboard, keeping an eye out for newly added cloud resources, making sure they include those tags or you may miss some significant resources when acting on that metadata later.
- Harder to change — Applying changes to tag structure across the board quickly becomes unmanageable.
- Metadata can obscure what’s important — While all this tagging metadata is extremely useful for slicing and dicing later, having it everywhere on your resources pollutes your IaC making it much more cumbersome and harder to maintain.
- Migration — What if you already have plenty of Terraform modules with cloud resources which weren’t tagged to begin with? Trying to tag them all now can be painstaking work.
Infrastructure-as-code is, well, just code. And that’s the case with any code — code repetition makes it harder to fix errors, apply enhancements, make adjustments and maintain readability. As tagging is a cross-cutting concern, the lack of proper layering or aspect control makes it harder to retrofit existing solutions.
Terratag to the rescue
Terratag is an open source project by env0 that enables you to automatically tag / label all the resources in your Terraform code. It also automatically tags all of your Terraform sub-modules, even if they don’t expose tags as an input.
Terratag is a CLI tool that supports all the major cloud providers like AWS, Google Cloud Platform and Microsoft Azure, and solves the complicated problem of tagging resources across applications at scale. It eliminates the risk of human error, can retroactively tag IaC resources previously deployed, and helps you easily utilize the tags for cost management, organization, reporting, etc.
Running Terraform in GitHub
In this blog post we will use Github Actions to deploy a Terraform repository into Google Cloud Platform.
Combining them
So let’s take a deep dive into the implementation details and see how we can combine these tools with ease, starting with building the deployment of our Terraform code using GitHub and then see the results in Google Cloud platform.
Terraform code
In this example, we’re using Terraform to deploy a simple VPC and a VM into Google Cloud Platform.
You can check the code here.
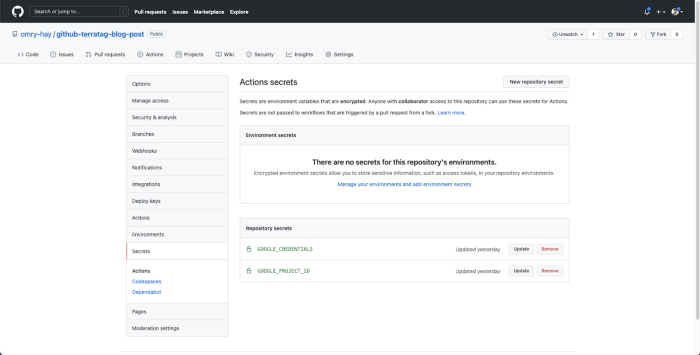
Setup variables
As our Terraform code needs some variables in order to run, we can set these up using Github Encrypted secrets. Under your Github Repo, go to Settings > Secrets and add two repository secrets:
- `GOOGLE_CREDENTIALS` — This variable value should be the JSON of your Google Cloud service account — See this documentation on how to create a service account key.
- `GOOGLE_PROJECT_ID` — Your Google Cloud project ID.
Setup Github Action
Setting up a Github Actions for Terraform is really easy, and all you have to do is add a simple file into your repository called `ci.yml` under the `.github > workflows` folder and add a configuration for each step of your Terraform deployment.
We’re going to add the following steps to our pipeline:
- Checkout — to checkout the code
- Setup Terraform — To set up terraform versions on the running action.
- Terraform init — To init terraform code and validate it.
- Terratag — downloading and running Terratag on the Terraform code.
- Plan — This step will run the terraform plan after adding labels with Terratag and save it to a file.
- Apply — This step will run the `terraform apply` command.
https://github.com/omry-hay/github-terratag-blog-post/blob/main/.github/workflows/ci.yml
Since Terratag scans the entire Terraform code, including any Terraform modules you might be using, we need to run the `terraform init` command before we run the Terratag command, as the init command will download all the relevant modules so that Terratag can scan them.
We can see 2 resources in this code:
- `google_compute_network` — This resource sets up the VPC. Terratag will not apply labels to it as it doesn’t allow labels as you can see in its documentation.
- `google_compute_instance` — This resource sets up the VM. Terratag applies the label that we defined.
Here is the output of Terratag on this Terraform code:
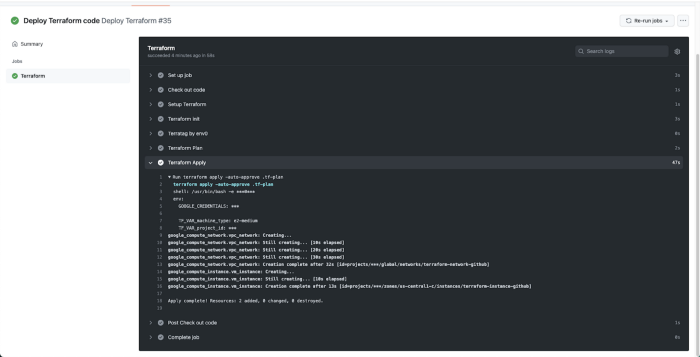
This is what this action will look like in the Github action UI. When the Terraform plan step is successfully completed, it will apply the changes.
Labels on GCP
As we mentioned before, labeling your resources has a lot of technical, operations and business benefits. This blog focuses on the cost aspect.
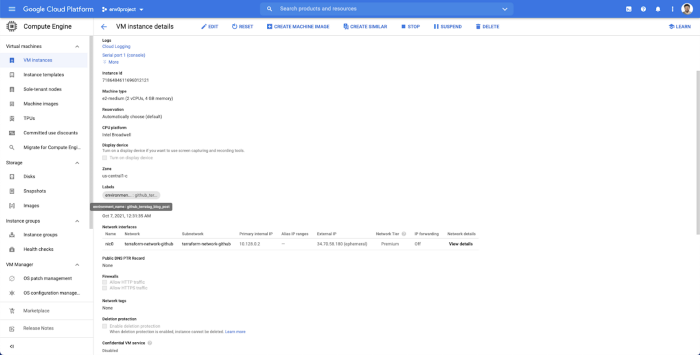
First, let’s see that the VM we’ve created is actually tagged correctly.
Let’s head out to the Google Cloud console. We’ll go to the Compute Engine page and, under VM, search for the VM we’ve just created. Then we’ll go into the VM Instance details page and see that the label exists with the right value.
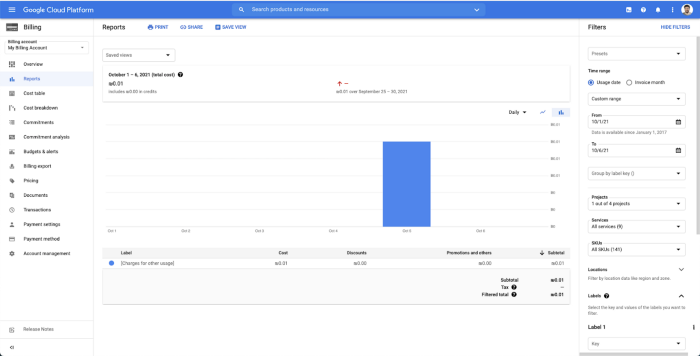
Now we can go to Billing and select Reports. On the right hand side of the page, we’ll see the Filters. Under labels, we can filter the label key and the label value and get the cost of those resources.
Summary
Tags and labels play a crucial role in managing a large-scale infrastructure and offer significant benefits utilizing tools such as Github Actions, and Terratag which has demonstrated advantages to ease the move when using Terraform. This will also help you create a standard in your organization when it comes to tags and labels, eliminating the need for human intervention or a large-scale project to change your current Terraform code base.
Feel free to check out the code base and leave us feedback and comments.