

.webp)


In a recent blog post, I discussed expanding the idea of “Feature branches” to “Feature environments”. Using Infrastructure-as-Code, we can create an environment for every feature we are working on, thereby giving us a more flexible, isolated development environment, and allowing us to test our code early in the development process.
In this post I’d like to continue down that path, and see how we can automatically create an environment for every pull request, and gain a number of advantages over traditional static staging or qa environments.
Pull Requests & Moving Beyond Static Staging
Pull requests are a well known and common workflow step for many development teams. We usually think of them as a way you “tell others about changes you've pushed”, and where you “can discuss and review the potential changes with collaborators and add follow-up commits before your changes are merged”.
PR’s are more than just a code review - they’re a milestone in a feature’s lifecycle and a way of saying “I’m ready for this to be shared”. Beyond sharing it for feedback with the wider team, this milestone is a critical time to ensure it functions exactly as expected as part of the whole application, including any potential infrastructure or configuration changes. However - just as we wouldn’t want our data migration to run on the shared database at this point, we also want to use dedicated test infrastructure.

Static VS Dynamic PR Environments
At this point, you might ask yourself - I’m already testing my code and infrastructure changes in our dev/qa/staging environment, why complicate things?
Well, there are a number of advantages to moving from traditional, static environments, to dynamic, per-pull-request environments:
- They’re Isolated and Dedicated - having a dedicated environment for each PR means no more confusion of which version or branch is currently in staging, and no coordinating between people who want to test different versions.
- Easier To Share - Because each PR has its own fully functional environment, non technical stakeholders can provide feedback on new features very early in the process. Developers can then iterate over this feedback - without interfering with work being done by other team members.
- No Wasted Resources - Because you’re only provisioning an environment when you actually need it for testing, you’re not wasting (or paying for) resources when you don’t actually need them.
- Removes Bottlenecks In The Release Cycle - Shared development and staging environments are notorious bottlenecks for development teams, especially when they are the first place where new code meets infrastructure. It’s not uncommon to see a queue of who is using the environment for testing their features. Your developers time shouldn’t be spent on waiting.
How Do You Actually Do It?
Ok, so “per pull request environments” is an awesome idea. How are we going to actually get there? There are a number of tools out there that can help you accomplish this task but in this post, I’ll be using env0, a first of it’s kind environment-as-a-service platform - not just to deploy the environments, but to manage them as well.
Your default assumption might be to just use your CI/CD platform to set up your environment. This works, but most CI/CD platforms are built for running short lived tasks, whereas an environment’s lifecycle extends beyond deploying it once: It needs to be updated, monitored, and in the end destroyed. Besides easily automating resource provisioning using Terraform, env0 will help me keep track of which environments are up, which ones have had issues, and will provide me a top level view of how my whole team is using these environments.
Besides env0, I’ll be using Github to host my code and open pull requests, and Github Actions to trigger my environment creation. I’ll be using the same code example from the previous post, which will be deployed on AWS.
If you’d like to try this out yourself, the prerequisites for this tutorial will be
- An env0 account (it’s free, just login)
- A Github account
- An AWS account

Getting Our Hands Dirty
Step one to fully automating anything is to make sure we can run it manually, so you’ll want to get your system set up. In my case, I’ve followed env0’s getting started guide, and taken the key steps of creating my own organization, connecting my AWS account, and creating a template for my Terraform code.
Custom workflows to the rescue
In the example code I’ve used, I also ran a bash script before deploying the environment. We can easily make sure this code runs before our Terraform is applied, using env0’s Custom Flows feature. I’ve already done this in advance and I’ve put my code in the env0.yml file, in our Github repo.
Let ‘er Rip!
We are ready to launch our first environment! Remember - this is just a manual test, to see things are ready for automation.
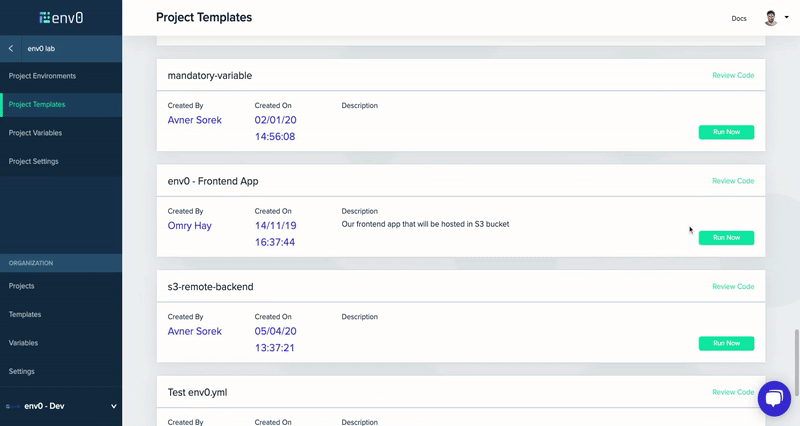
In the case of env0, just go to your Project Templates pages, and click “Run now” on the template we’ve created before. In the next screen, you can validate your settings, and when you’re ready - click “Run”.
Great!
Integrating into CI/CD
Now that we know our environment management system will properly configure our environments, we need to make it run each time we open a pull request. For that, we’ll be using Github Actions to trigger env0’s CLI.
In order to create an environment on env0 from Github Actions, we need to create an API key for env0.
Next, we’ll need to save the API key and secret as Github Secrets, in the same manner we saved our AWS credentials to env0.

The final step of connecting everything, is telling Github how to trigger our environment deploy. We’ll add the following code to our codebase, in the file `.github/workflows/pr-environments.yml`.
In the code above, you can see we
- Determine the action depending on the Github event data
- Fetch the env0 CLI, using the `checkout` action
- Run the env0 cli to deploy, update, or destroy the environment
- The name of the environment will be the branch name
That’s all folks!
We now have a fully functioning pipeline, and our setup will automatically create a new environment for every PR we open! When we deploy a new feature, even if that feature requires new or different infrastructure, the changes in our Terraform code will automatically be reflected in the resources provisioned for the PR environment!


In the case of env0, even though environments will be automatically created and destroyed by our CI/CD integration, we can also use the env0 UI as a control plane, for understanding which environments are up, and what they consist of. You can also use env0’s cost monitoring features, to understand how much each of these environments actually costs.

Thank you for taking the time to read this post, I hope it helps you setting an environment-per-PR pipeline for your team. Once you’ve tried it yourself, I’d love to hear about it! Let me know in the comments below or on Twitter at @envzero.


.avif)
.png)
.png)
