

.webp)


.avif)
Web applications, Single page applications, static websites. They are everywhere. No matter if your back-end is running on Kubernetes or serverless, public cloud or on-premise, if you have a front-end, there is a good chance it is a browser rendered, statically delivered bundle of HTML, CSS and Javascript.
In my previous blog posts, I discussed ‘Feature Environments’ and ‘Per-Pull Request Environments’. Making your entire system run such environments is no small feat, especially if you are running complex infrastructure, a very large scale system, or legacy code without IaC. But you can still make a small effort and gain a lot of value, by adapting these isolated environments for your front-end. It’s the perfect place to start, because
- Statically hosted front-ends tend to live on relatively simple and stateless infrastructure.
- Sharing a feature-in-progress on the front-end is the most interesting part of the feature to share, and non-technical stakeholders will want to see that, e.g., a Product Manager that wants to do acceptance tests.
Per-pull request environments for the front-end are commonly called “Preview environments” and can be achieved in many ways. Some CI/CD providers even offer preview environments as a paid feature, but I’d like to show you how easy it is to do this on your own - using Terraform. Rolling this out on your own, will give you better control over your infrastructure, allowing you to create preview environments which are closer to your production environment, and will probably cost you less - by cutting out the middleman.
To demonstrate how, I’ll be running a simplified React app, packaged with Parcel, and using Terraform for resource provisioning, Github as a VCS, and env0 as my environment management platform. The full source code can be found here.
There are two important files we need to look at - the first one is `env0.yaml` :
env0 will handle our Terraform files natively, taking care of creating, updating, and deleting any cloud resources we need. Before env0 initializes Terraform, we want to build our frontend. We want to do that before, so in case anything fails, we won’t provision the infrastructure for nothing.
After Terraform completes, we will run an aws CLI command, to sync our dist folder to our s3 bucket. This will upload our built website files to the bucket for hosting.
The second file we should notice is our `pr-environments.yaml`, located in the `.github` folder. It will tell Github to trigger env0, everytime we open, update, or close a Pull Request.
The steps here are pretty simple - we install the env0 CLI using a simple `yarn install` command, and we run the env0 CLI with the required parameters. The CLI will already know to create or update an environment based on the name, which will be the same as the branch we are working on.
When the PR will be closed, we will run the CLI with the `destroy` command, and env0 will take care of cleaning up our cloud resources, so we can keep a clean cloud account, with low costs.
Looking at an open Pull Request, Github informs us that it ran the deployment successfully -

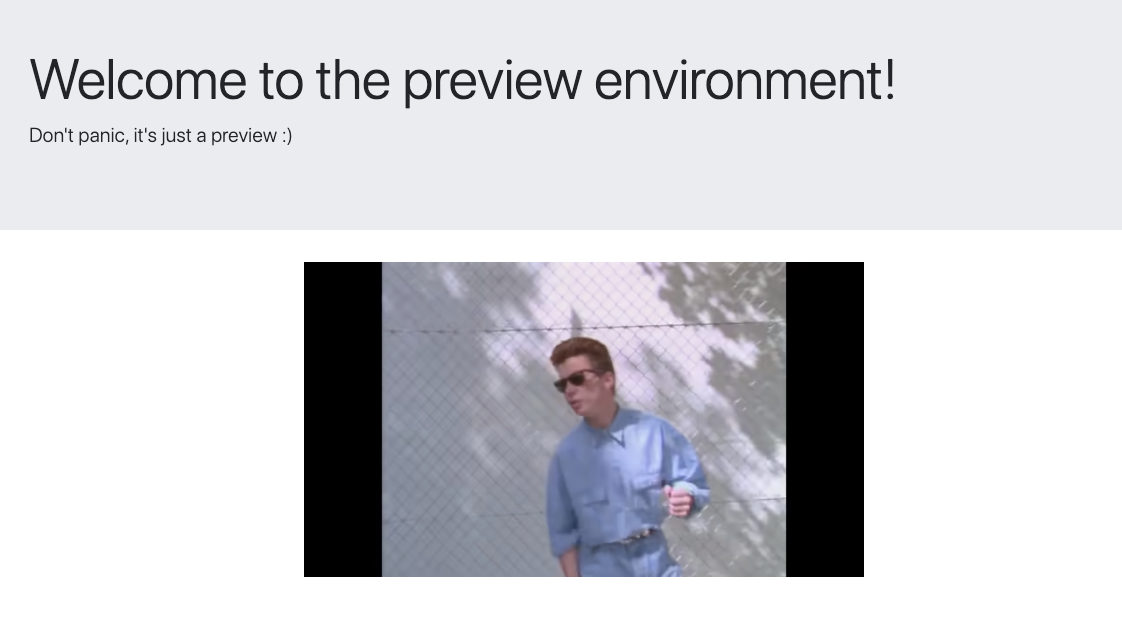
Looking at env0, we can see a list of all our PR environments, and for each one, we can use the “Outputs” section, to get the environment’s website URL -
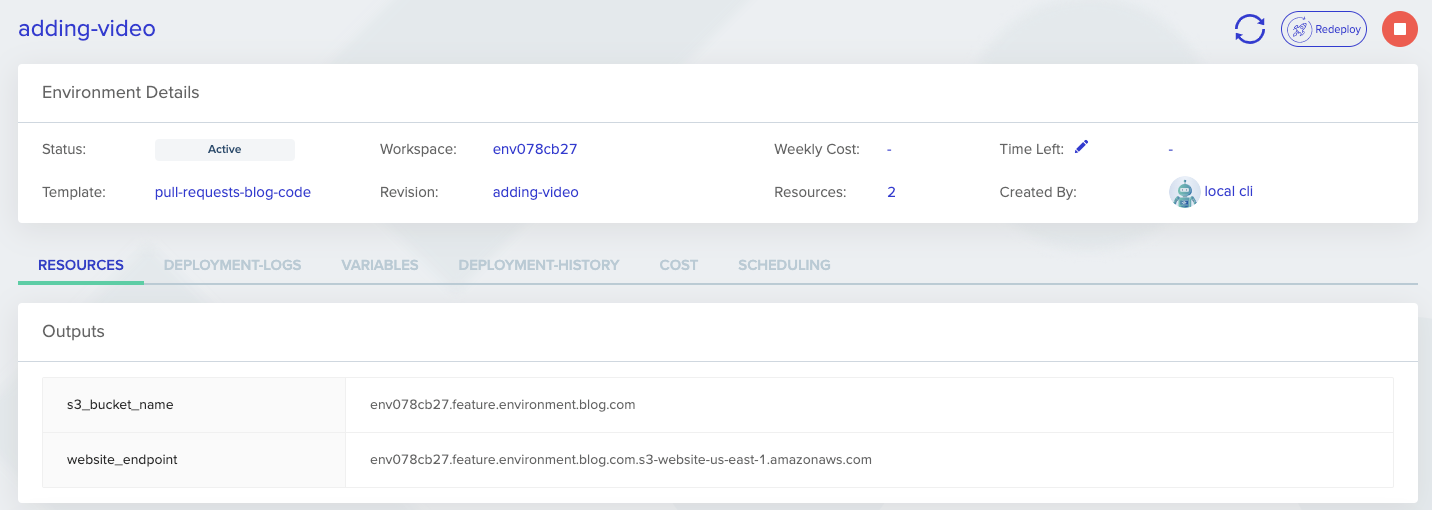
That way I can Slack my product manager, and let them know they can already play around with the new video feature we’ve been working on, so I can get feedback early!
Advanced Environment Management
Using env0 for managing preview environments opens up some new options that are only available on an advanced environment-as-a-service platform such as env0. To name a few:
- Time To Live for environments - making sure I don’t have any leftover resources.
- Detailed cost monitoring - getting actual costs per environment is a huge help in understanding where our cloud costs come from.
- Role based access - anyone in the organization can access env0, and I know they won’t do any damage, when they are assigned the correct role.
Thank you for taking the time to read this post, I hope it helps you setting up preview environments for your web application. Once you’ve tried it yourself, I’d love to hear about it! Let me know on Twitter at @envzero.


.avif)
.png)
.png)
