.webp)


In this section of the IaC Scanning Tools Guide, we will be looking at Checkov and discussing the benefits, key features, and looking at some real world examples. You can explore the other parts of this guide below.
Jump to section:
What is Checkov?
From the Checkov website:
Checkov scans cloud infrastructure configurations to find misconfigurations before they're deployed.
Checkov uses a common command line interface to manage and analyze infrastructure as code scan results across platforms such as Terraform, CloudFormation, Kubernetes, Helm, ARM Templates and Serverless framework.
Checkov works by scanning IaC files for common security and compliance issues, such as open security groups, unencrypted storage buckets, or missing encryption keys. It uses a policy-as-code framework that allows users to define and enforce rules for their cloud resources. Checkov comes with more than 750 built-in policies that cover industry standards like CIS Benchmarks, PCI, and HIPAA. Users can also create and contribute custom policies using Python or YAML.
Checkov can be installed as a command-line tool or as a Visual Studio Code extension. It can also be run as a pre-commit hook or as part of a continuous integration pipeline. Checkov provides detailed reports of the scan results, highlighting the violated policies and suggesting remediation steps.
Checkov is an open-source project created by Bridgecrew, a cloud security company that provides end-to-end solutions for cloud-native environments. Palo Alto Networks has acquired Bridgecrew in March of 2021. Checkov is actively maintained and updated by Bridgecrew and a community of contributors. You can find more information about Checkov on its website or GitHub repository. Users can also leverage the Bridgecrew platform to get additional features like runtime scanning, pull request annotations, repository badges, compliance reports, and more.
Benefits and Key Features of using Checkov
Some benefits and key features of using Checkov are:
How to get started with Checkov
How to install Checkov?
The first step is to install Checkov on your machine. If you follow along with our GitHub repo using Codespaces, it will be installed for you. Otherwise, you can use pip, brew, or docker to install Checkov. For example, to install Checkov using pip, you can run the following command:
How to use Checkov?
Once you have Checkov installed, you can use it to scan your IaC files for security and compliance issues. You can run Checkov on a single file, a directory, or a git repository. For example, to scan a Terraform file named main.tf, you can run the following command:
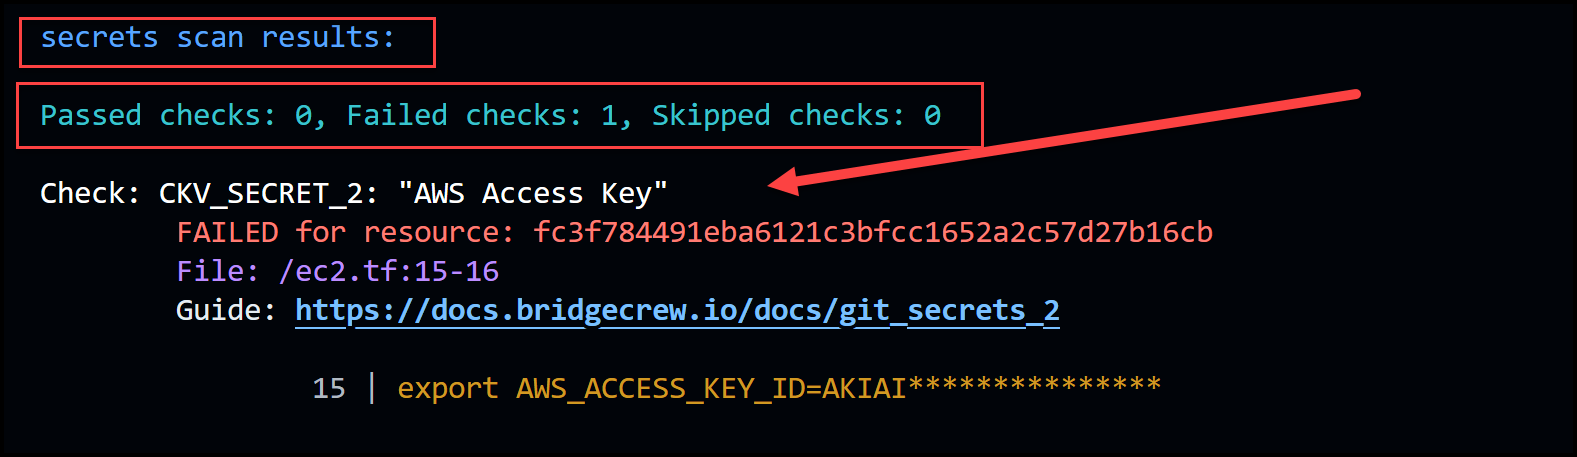
Checkov will output a list of checks that passed or failed for each resource in your file. You can also see the check ID, the check name, where in the file the check occurred and a URL to a guide for more explanation. You can also get the severity level for each check if you sign up for a free account with Bridgecrew and add your API. Check this link to see how to work with severity levels: Prioritize, skip, and fail with policy severities in Checkov - Bridgecrew Blog
Here is a sample output of Checkov without using the API:

You can also use the guide URL to access the Bridgecrew platform and see more details and remediation steps for each check.
You can customize Checkov's behavior by using various flags and options. For example, you can use the --framework flag to specify which IaC framework you want to scan (terraform, cloudformation, kubernetes, etc.). You can use the --check flag to run only specific checks by their ID or name. You can use the --skip-check flag to skip specific checks by their ID or name. You can use the --output flag to change the output format (cli, json, junitxml, sarif, etc.)
Example use cases of Checkov
Now let’s take a look at two use cases. One for scanning Terraform files and the other for scanning Kubernetes manifests.
Use case 1: Scan your Terraform files for misconfigurations
Terraform is a widely used tool for provisioning and managing cloud resources using declarative configuration files. However, writing Terraform code can be prone to human errors and oversights that can lead to security and compliance risks for cloud resources. For example, you might accidentally expose a sensitive resource to the public internet, or forget to enable encryption or logging for a storage bucket.
Checkov can help you avoid these common pitfalls by scanning your Terraform files for hundreds of predefined policies that cover best practices and standards such as CIS benchmarks, PCI, HIPAA, and more. Checkov can also help you enforce custom policies that match your organization's specific requirements and preferences.
To use checkov to scan your Terraform files, you can simply run the following command in your terminal, the -d flag tells checkov to scan an entire directory.
This will output a report that shows the status of each policy check (passed or failed), the resource and attribute that triggered the check, and a link to a detailed explanation of the policy and how to fix it.
We’ve taken some Terraform code from the terragoat GitHub repo for illustration.
Try it yourself. Change your directory into the Terraform folder in our repo and then run the following command:
The output is too verbose to show here but it is similar to the above-shown snapshots.
You can also use checkov to scan your Terraform files before applying them to your cloud environment, by integrating it with your CI/CD pipeline or using a pre-commit hook. This way, you can catch and fix any issues before they become a problem in production.
Use case 2: Scan your Kubernetes manifests for security best practices
Kubernetes is a powerful platform for orchestrating and scaling containerized applications. However, Kubernetes also introduces new challenges and complexities for securing your workloads and clusters. For example, you might need to ensure that your pods run with the least privilege principle, that your network policies restrict unauthorized access, or that your secrets are stored securely.
Checkov can help you audit and harden your Kubernetes manifests by scanning them for dozens of policies that cover security best practices and recommendations from sources such as the Kubernetes documentation, the CIS Kubernetes benchmark, and the NSA/CISA Kubernetes hardening guidance.
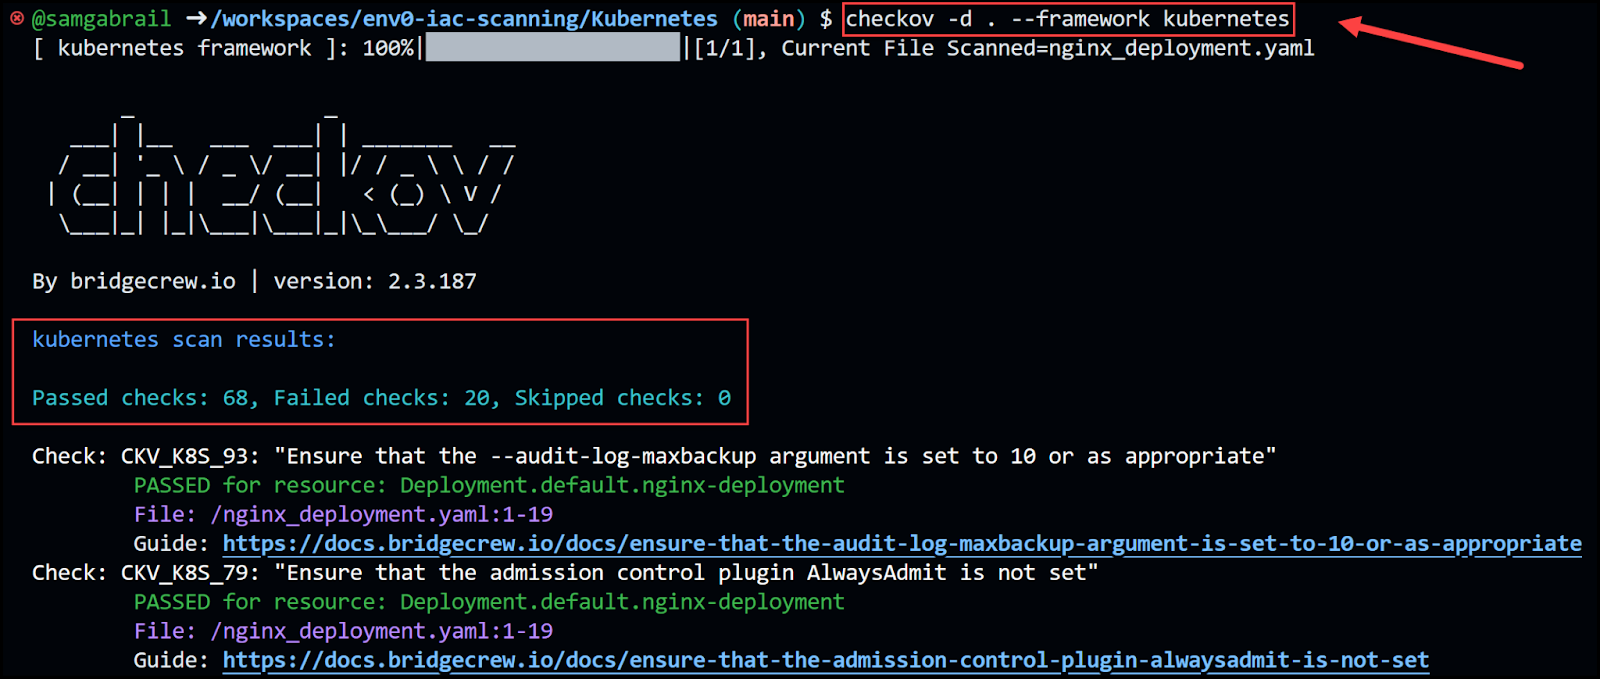
To use checkov to scan your Kubernetes manifests, you can run the following command in your terminal:
This will output a report similar to the one for Terraform, showing the status of each policy check, the resource and attribute that triggered the check, and a link to a detailed explanation of the policy and how to fix it.
Let’s try it. Using the following NGINX deployment found in the folder Kubernetes and the file nginx_deployment.yaml in our repo:
Run the commands below:
Check the output. Below is a small section of the output:

Checkov Custom Policies
As mentioned before, we can create our own custom policy in Python or YAML. In this example, we will use Python as shown in the docs.
This example assumes a unique need to enforce bucket ACL policies only when the tag Scope=PCI is present.
You will find a file called s3_pci.tf containing the following S3 bucket Terraform resource. Notice how we specified the acl to be public-read and the tag is Scope=”PCI” to trigger a violation.
Notice the content of the folder called checkov_my_extra_checks:
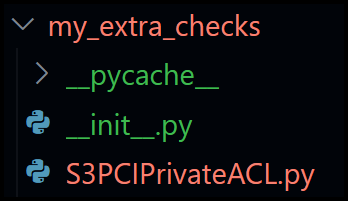
The __init__.py file contains the following:
And S3PCIPrivateACL.py contains the following:
Now run the command below and observe the output:
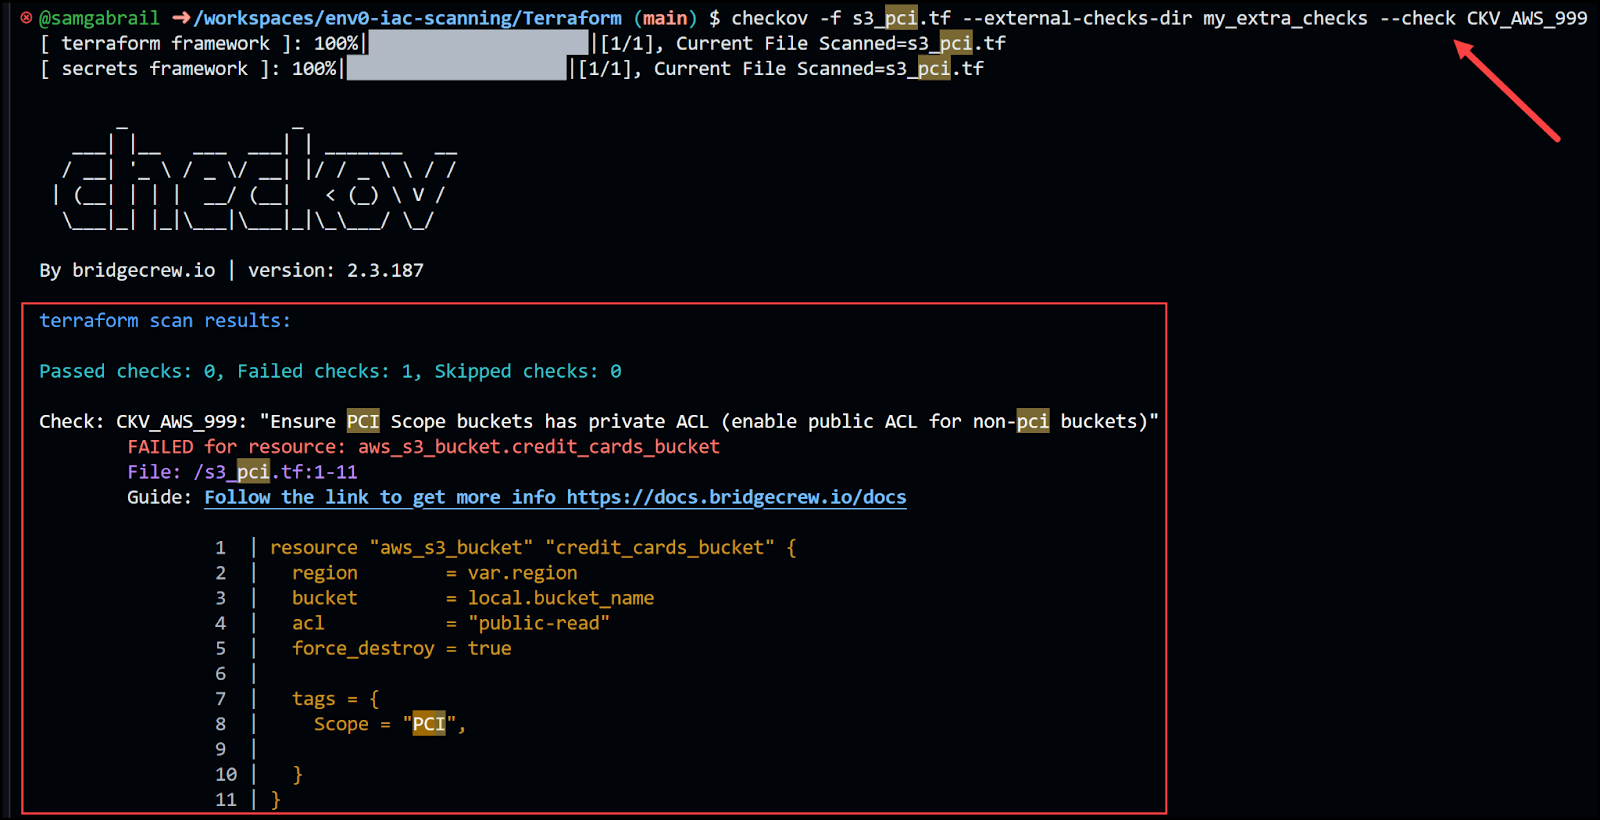
Notice that using the above command, we specified the exact check that we created with ID: CKV_AWS_999. There is a violation because the tag contains the scope PCI and the acl is public-read. If you’re interested in using YAML for custom policies, check out the documentation.